A few weeks ago I noticed something weird with some of my pictures: every time I opened a JPEG file from Lightroom on my iPhone the colors looked completely wrong and washed out, as if the image was heavily desaturated.
This is something I do often. When, for example, I want to post a picture from my dedicated camera to Instagram, I export it as a JPEG file using Lightroom, send it to my phone via iMessage or Dropbox, and upload it to Instagram. The problem is, by the time the pictures arrive to my phone, the colors are all messed up.
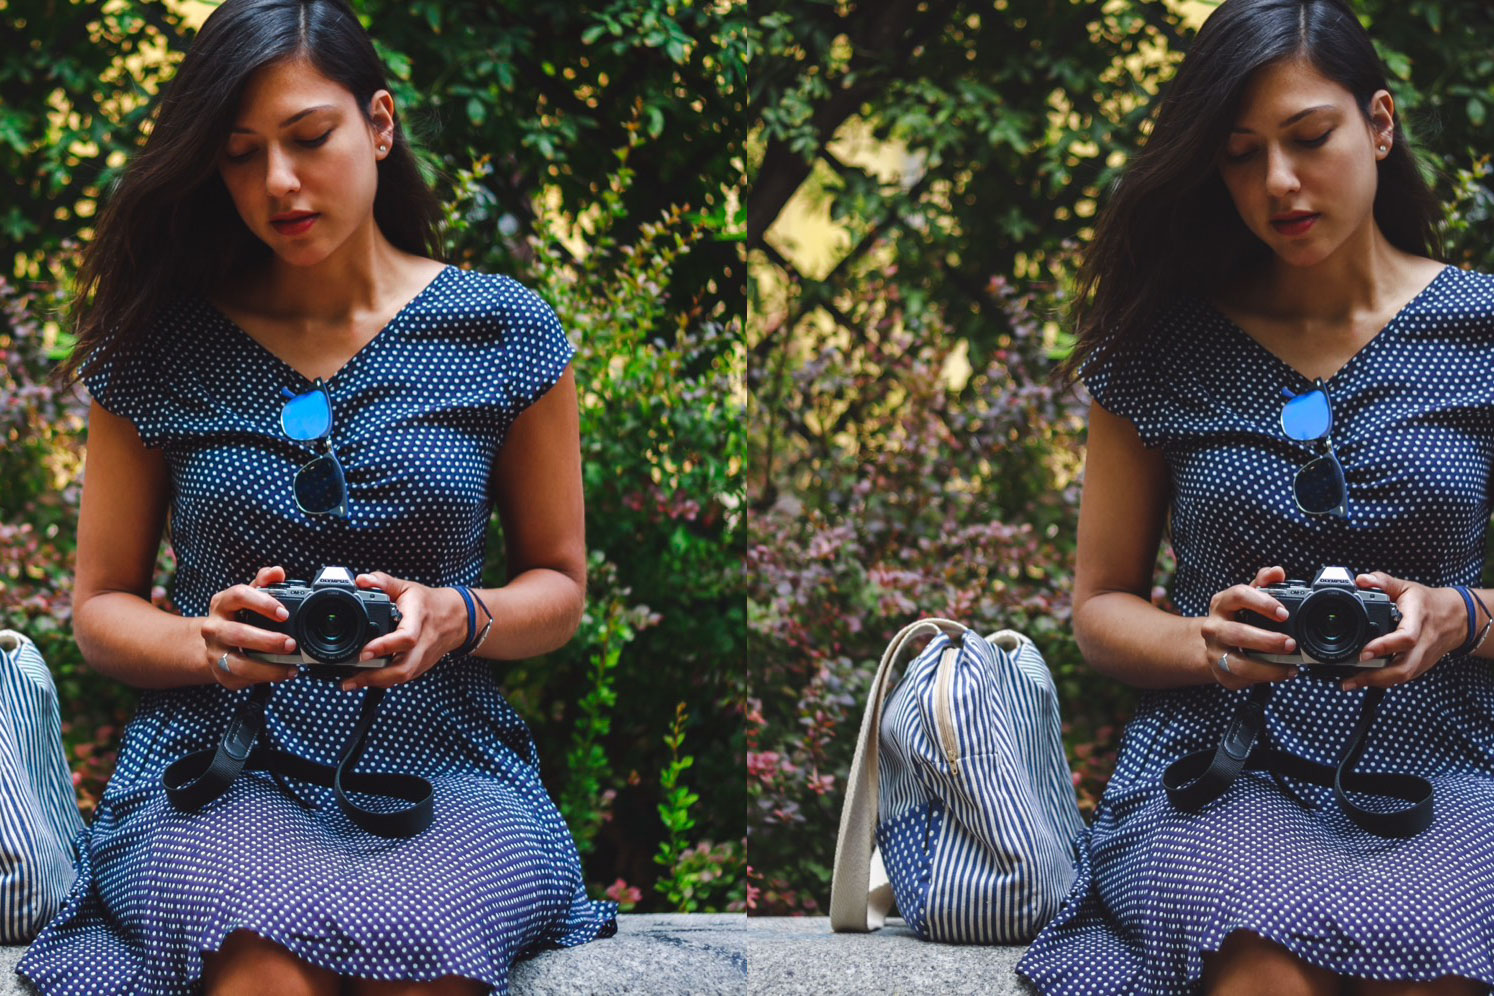
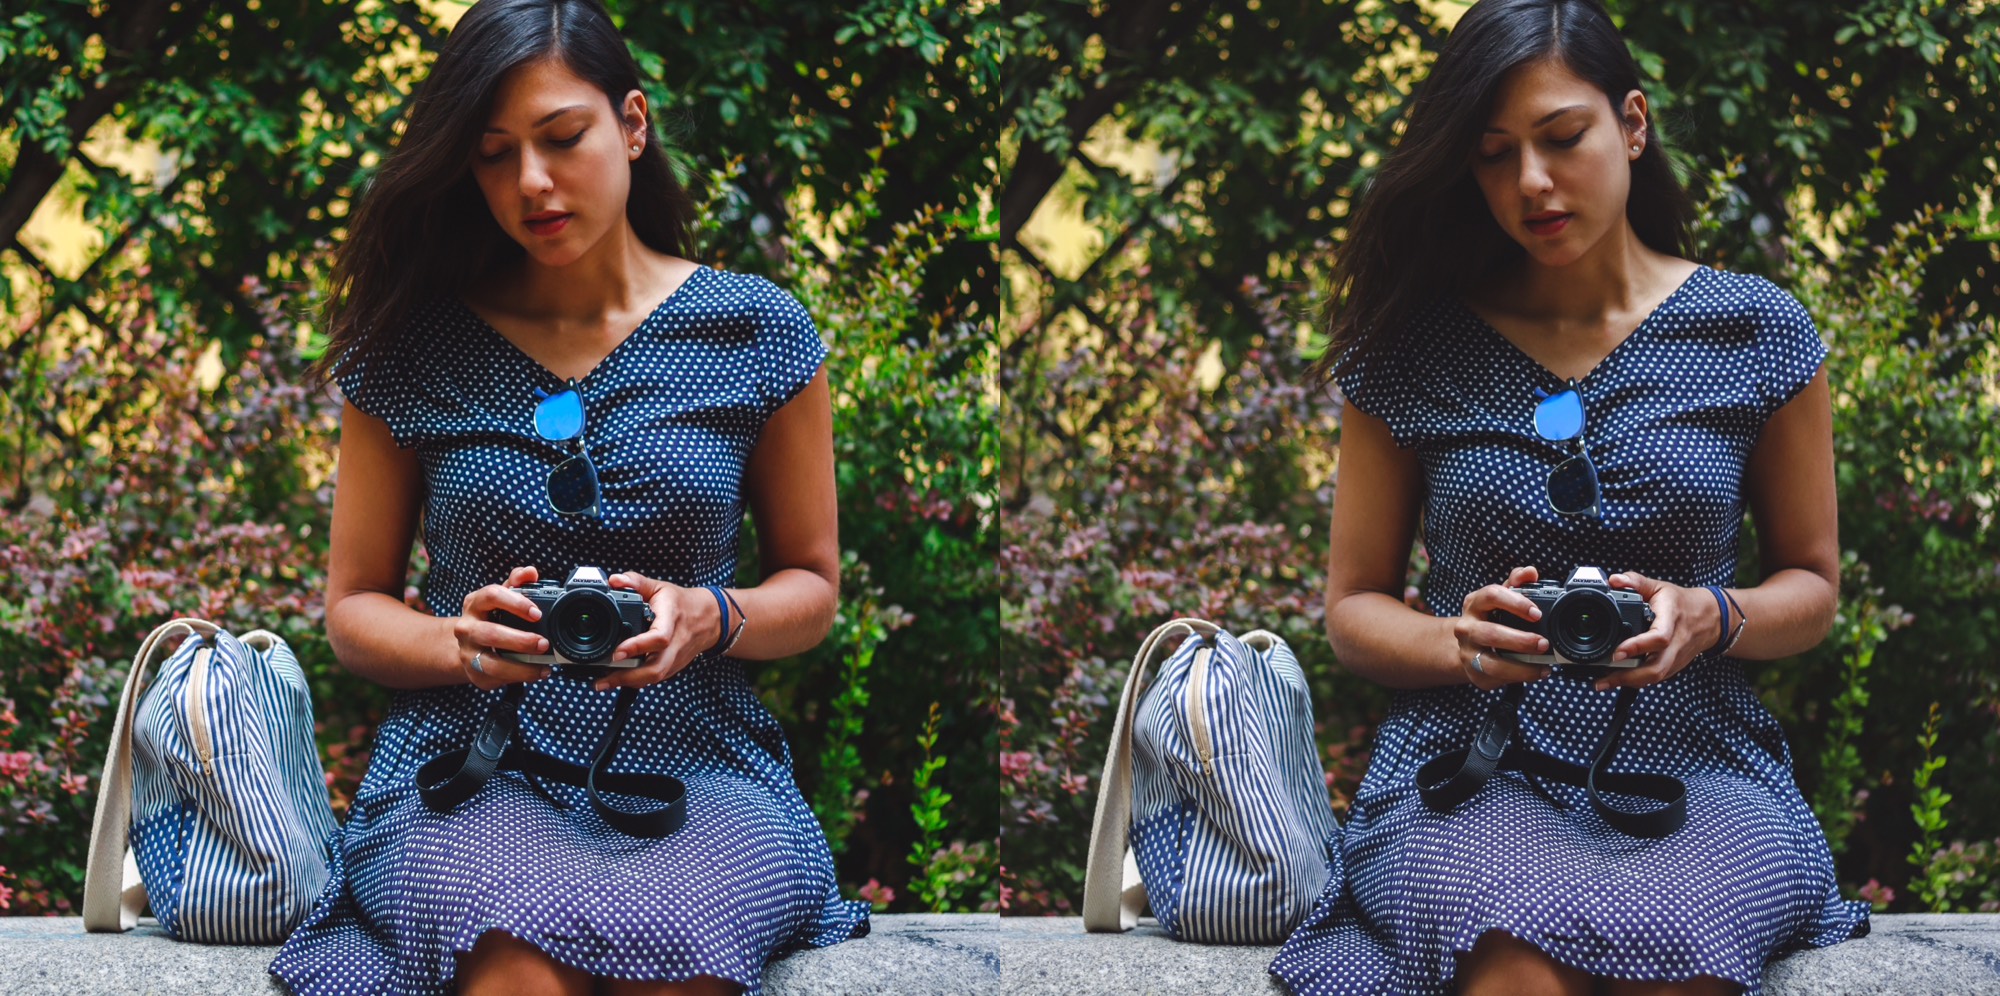
Take a look at this image, for example:
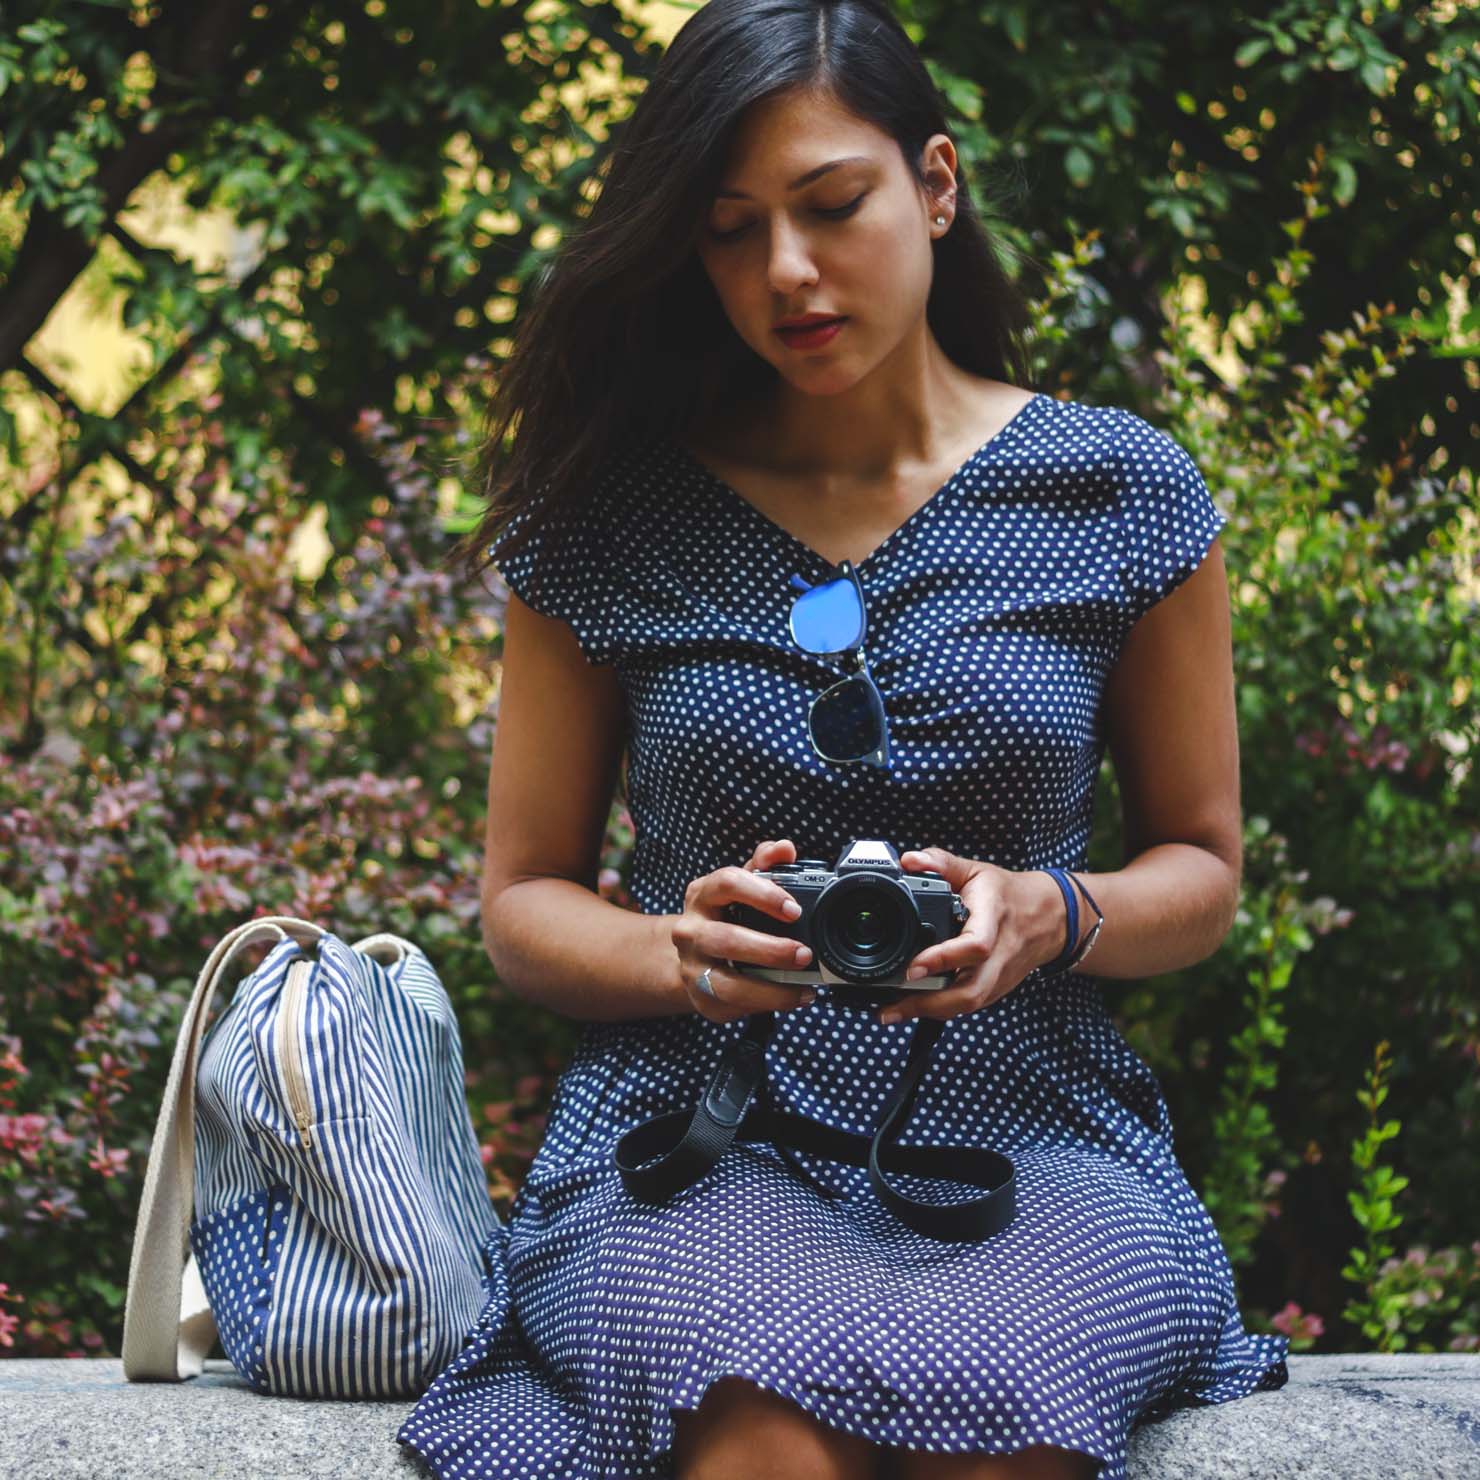
If you’re reading this on a Mac or a Windows PC, that should look fine. However, this is what that same image looks like when viewed on an iOS device:
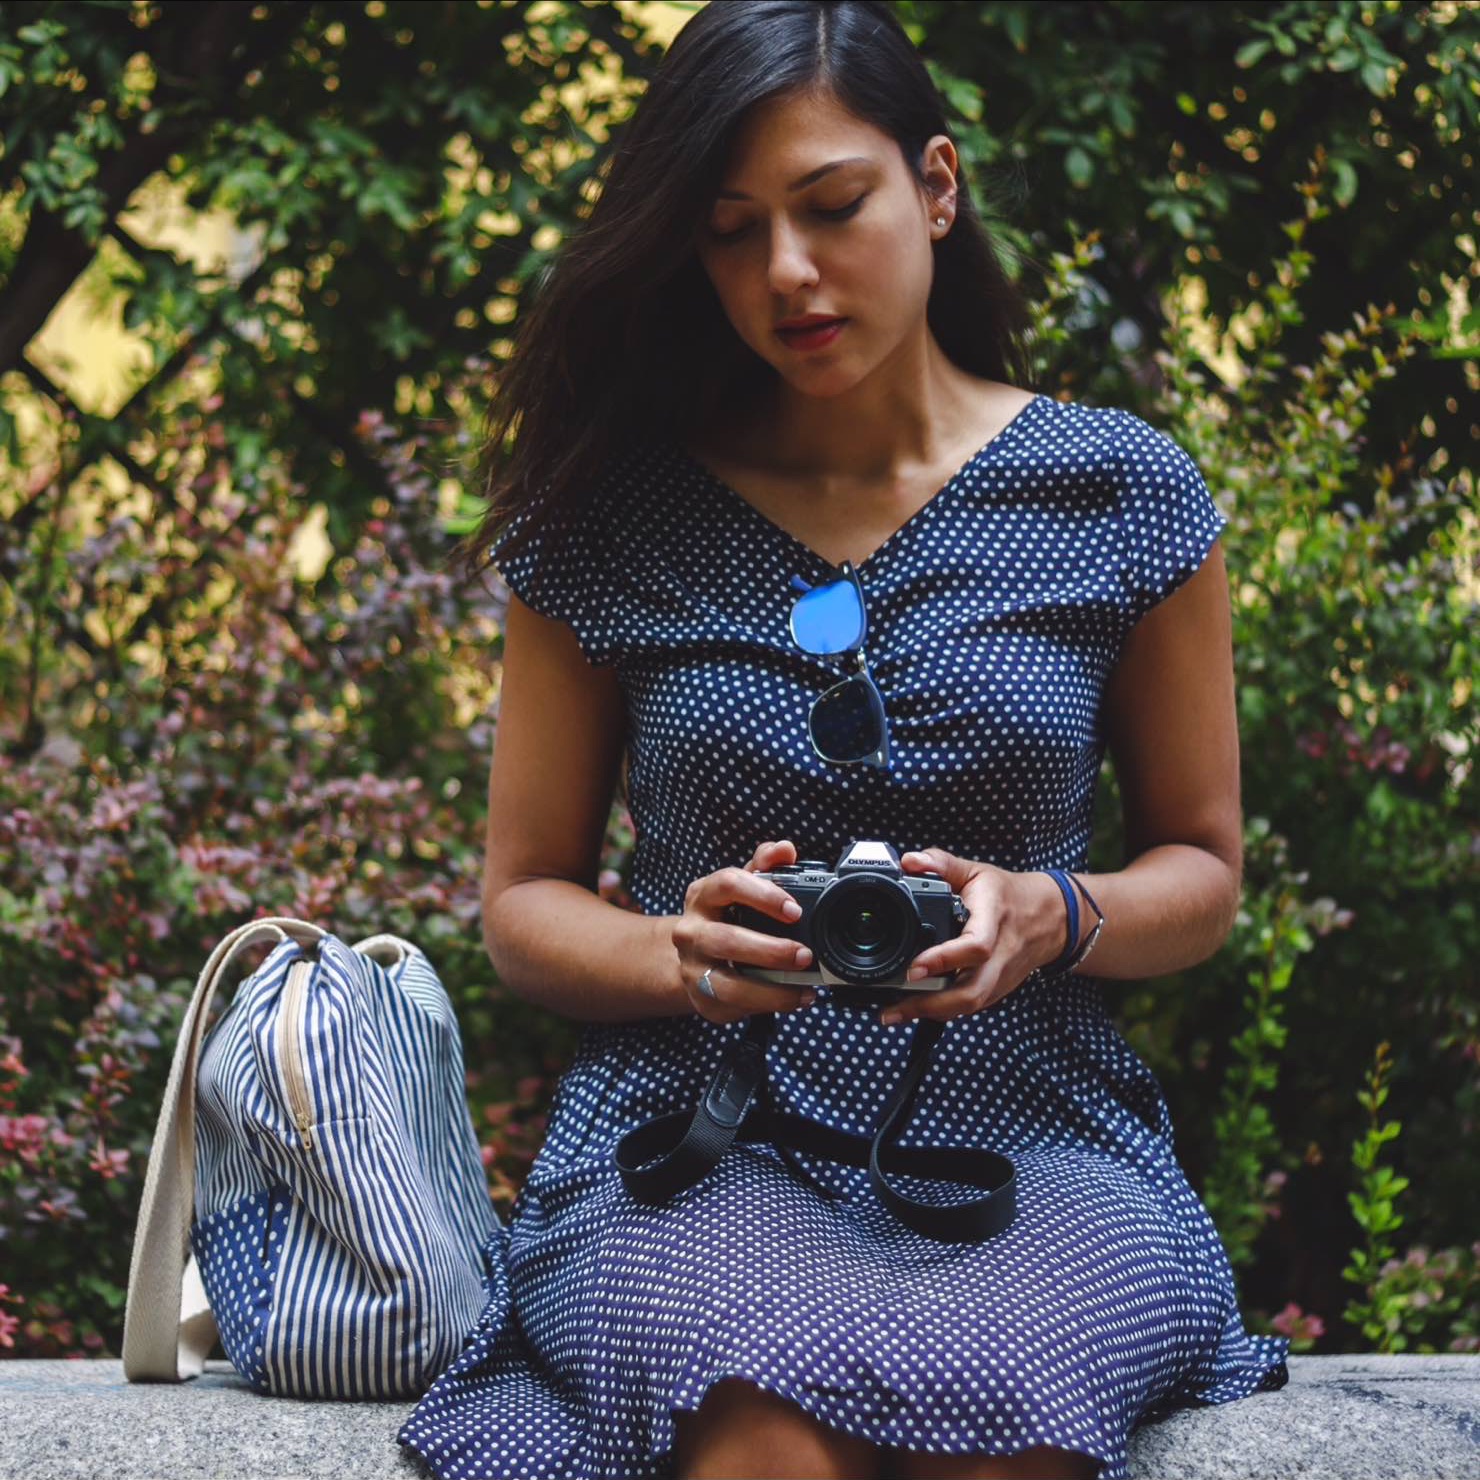
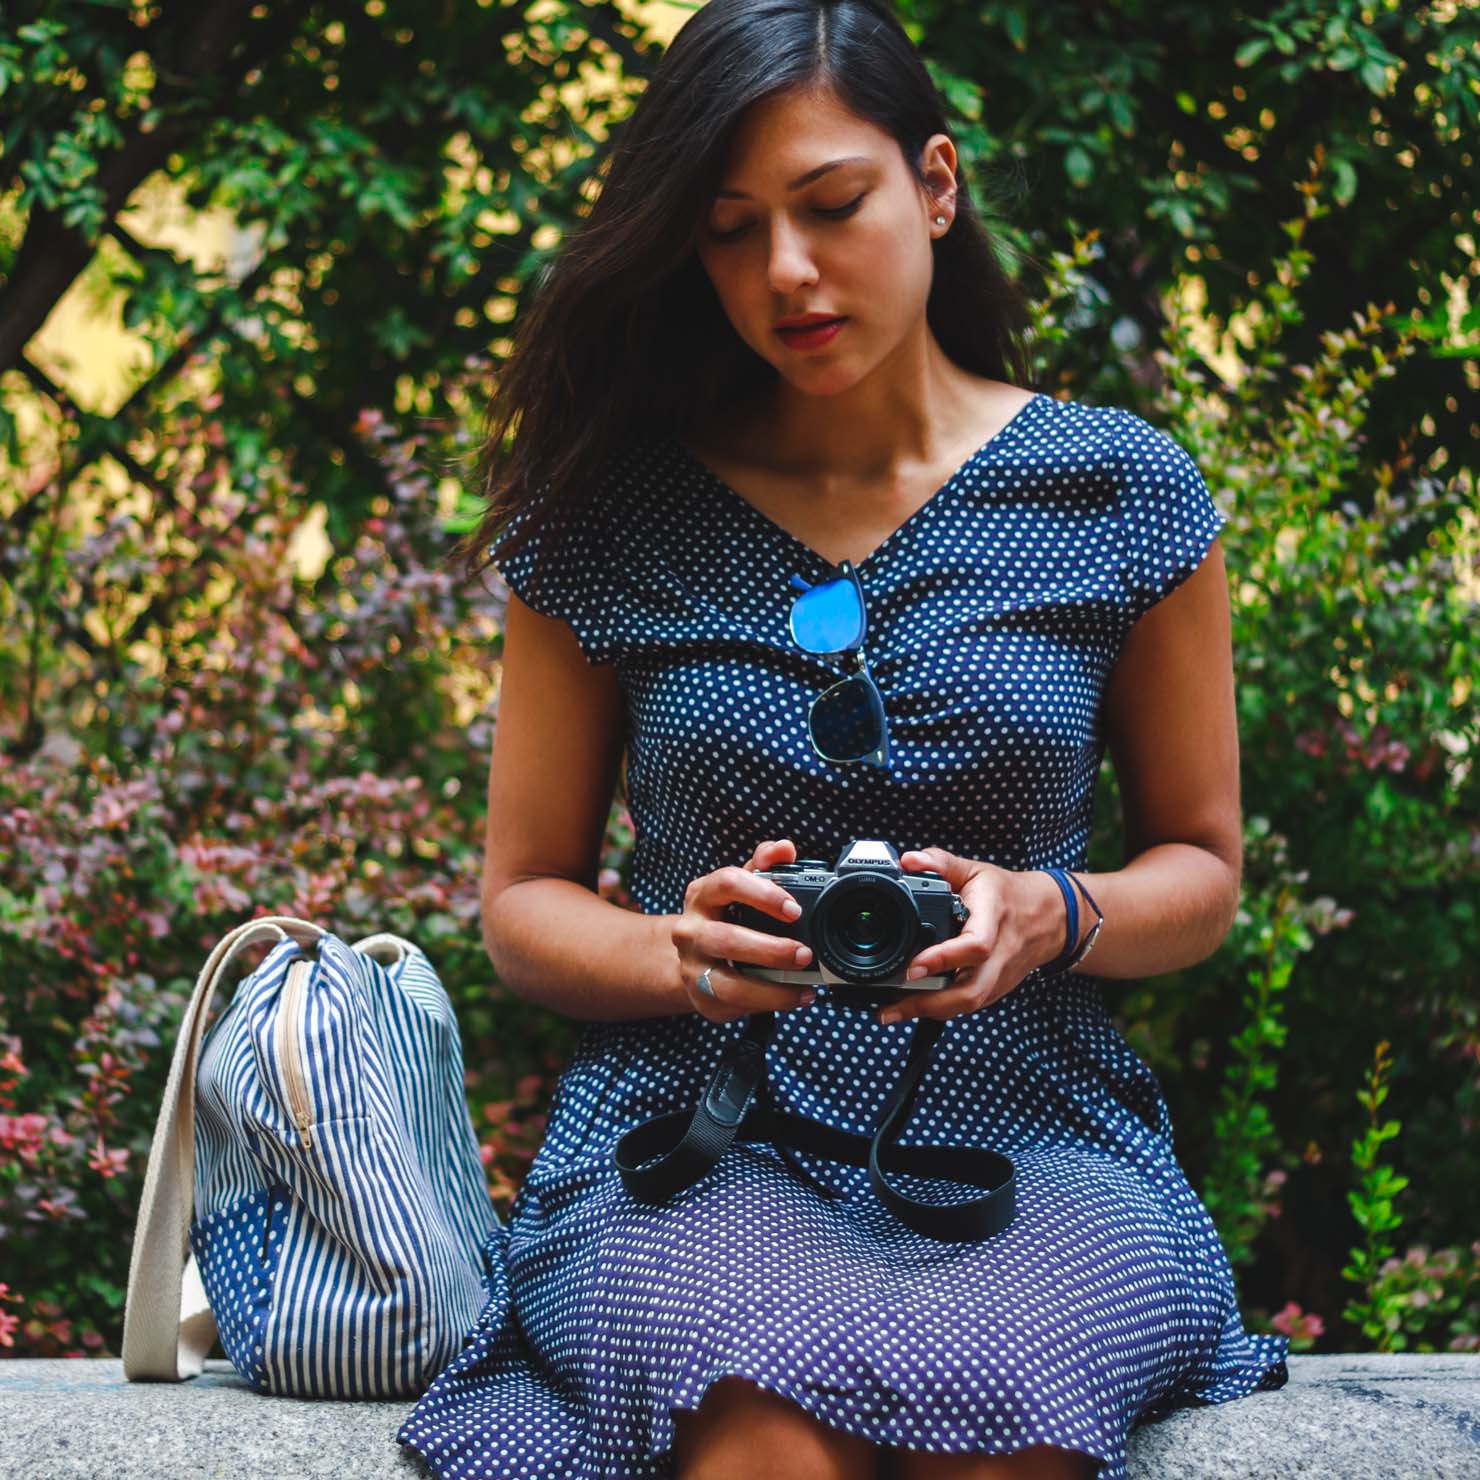
And for those of you reading this on iOS devices, this is what both images should look like:
Have I got your attention now? Good.
Remember, all three of those images are the exact same file. Since a Mac always displays the correct colors, I had to take screenshots on my iPad to be able to show you the difference. And what a difference it is. Here’s a side by side comparison, to further drive the point home:
OK, so what the hell is going on here?
Welcome to the wonderful world of color management
The reason this phenomenon occurs is something called color management. From Wikipedia:
The primary goal of color management is to obtain a good match across color devices; for example, the colors of one frame of a video should appear the same on a computer LCD monitor, on a plasma TV screen, and as a printed poster. Color management helps to achieve the same appearance on all of these devices, provided the devices are capable of delivering the needed color intensities.
Parts of this technology are implemented in the operating system (OS), helper libraries, the application, and devices. A cross-platform view of color management is the use of an ICC-compatible color management system.
This definitely sounds like a great idea, at least on paper, but here’s the problem: iOS is extremely particular when it comes to color management.
From Apple’s own iOS Developer Library (emphasis mine):
iOS application development uses the targeted color management model. Your content is matched to the sRGB color space on the authoring platform. This matching is not performed dynamically on the iOS device. Instead, it happens during authoring on your Mac OS X desktop. (…)
Targeted color management may also occur when you sync content to your mobile device. In fact, iTunes running on the desktop provides color management to the iOS targeted color space when you sync content from iPhoto to your iOS device.
What this means is that, when you sync your pictures to an iOS device using iTunes, your Mac is doing all the heavy lifting behind the scenes, making sure the images are color-matched to the sRGB color space before copying them over to your device.
That’s a clever bit of engineering right there, but what happens if you don’t sync your pictures using a proper authoring tool such as iTunes? What if you simply copy some unmatched JPEG files over to your iPhone by, for example, iMessaging them to yourself or syncing them to a Dropbox folder?
Well, what happens is that iOS’s targeted color management system cannot find the proper relationship between the actual colors in your images and the colors of the sRGB space it knows how to work with, and therefore it can’t display accurate colors.
There are two critical factors at play here:
iOS devices are only able to resolve the sRGB color space.
The sRGB color space is considerably narrower than Adobe RGB, the color space typically used to calibrate computer displays, including Macs.
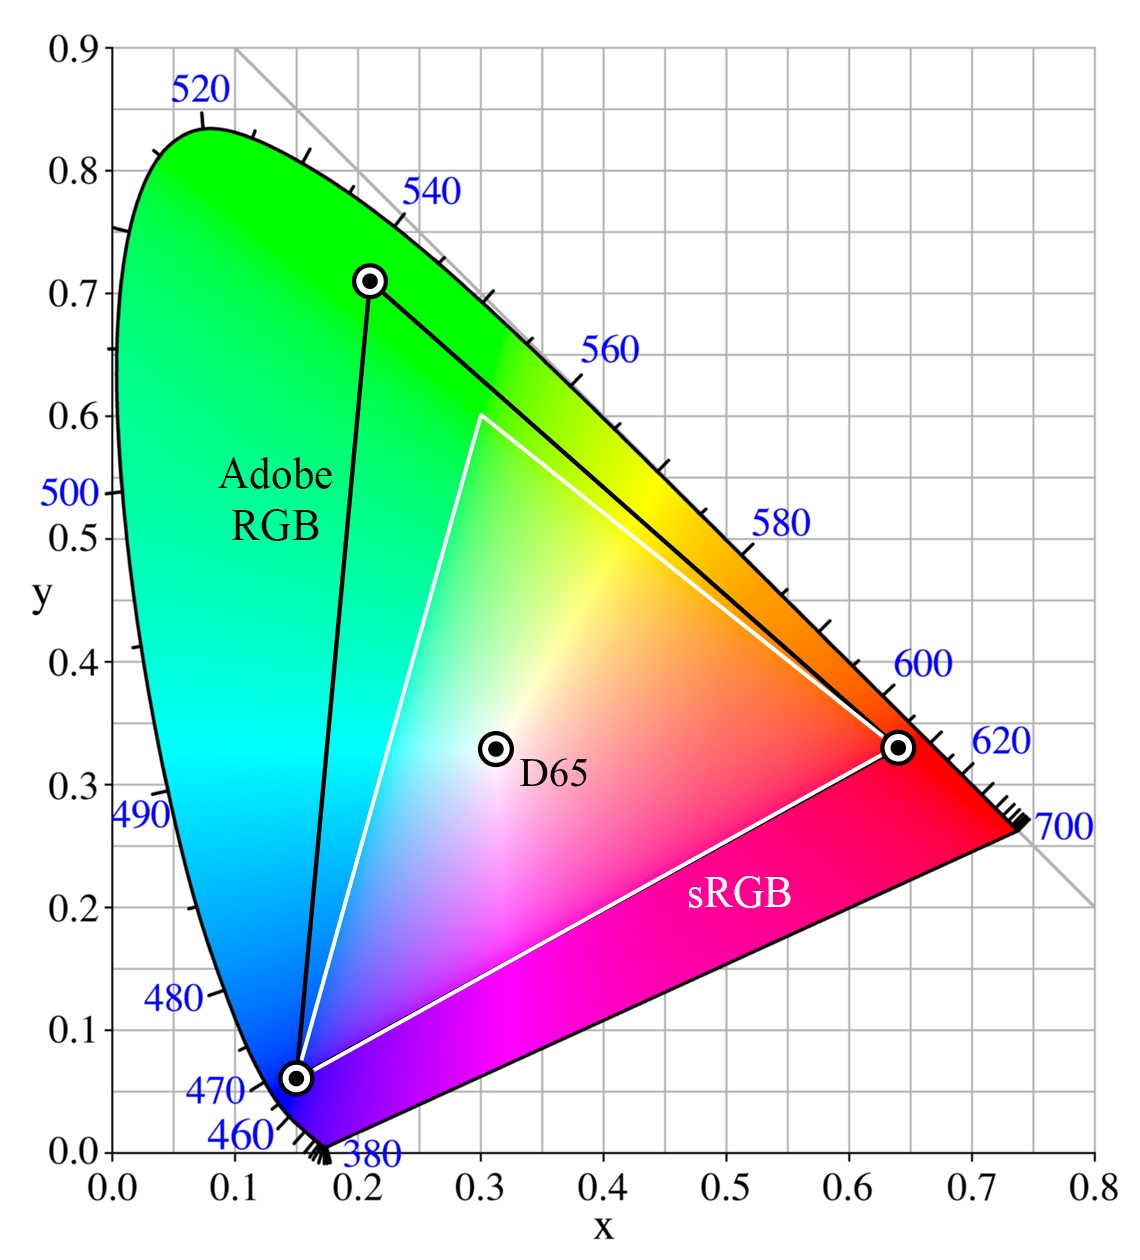
The Adobe RGB color space vs the sRGB color space. Image source: Wikimedia Commons.
iOS can’t deal with the Adobe RGB color space, which is why images matched to that color space look washed out when viewed on iOS devices. In order to avoid that, images must be color-matched to the sRGB space instead.
Therefore, if you’re working with JPEG files that happen to be matched to the Adobe RGB color space, you need to you make sure your images are converted to the sRGB color space before copying them over to your iOS device, or you’re simply going to end up with washed out colors.
Unsurprisingly, this is exactly what Apple recommends doing (again, from the same iOS Developer Library document):
When your content is imported, convert it to the working color space sRGB. Even if your media is in a wider gamut (for example, raw photos), and your monitor can display wider than the sRGB gamut, your color managed application will translate those colors to sRGB, the color space for the finished product. By using an sRGB working color space you can get an accurate prediction of what your media will look like when displayed on the actual iOS device.
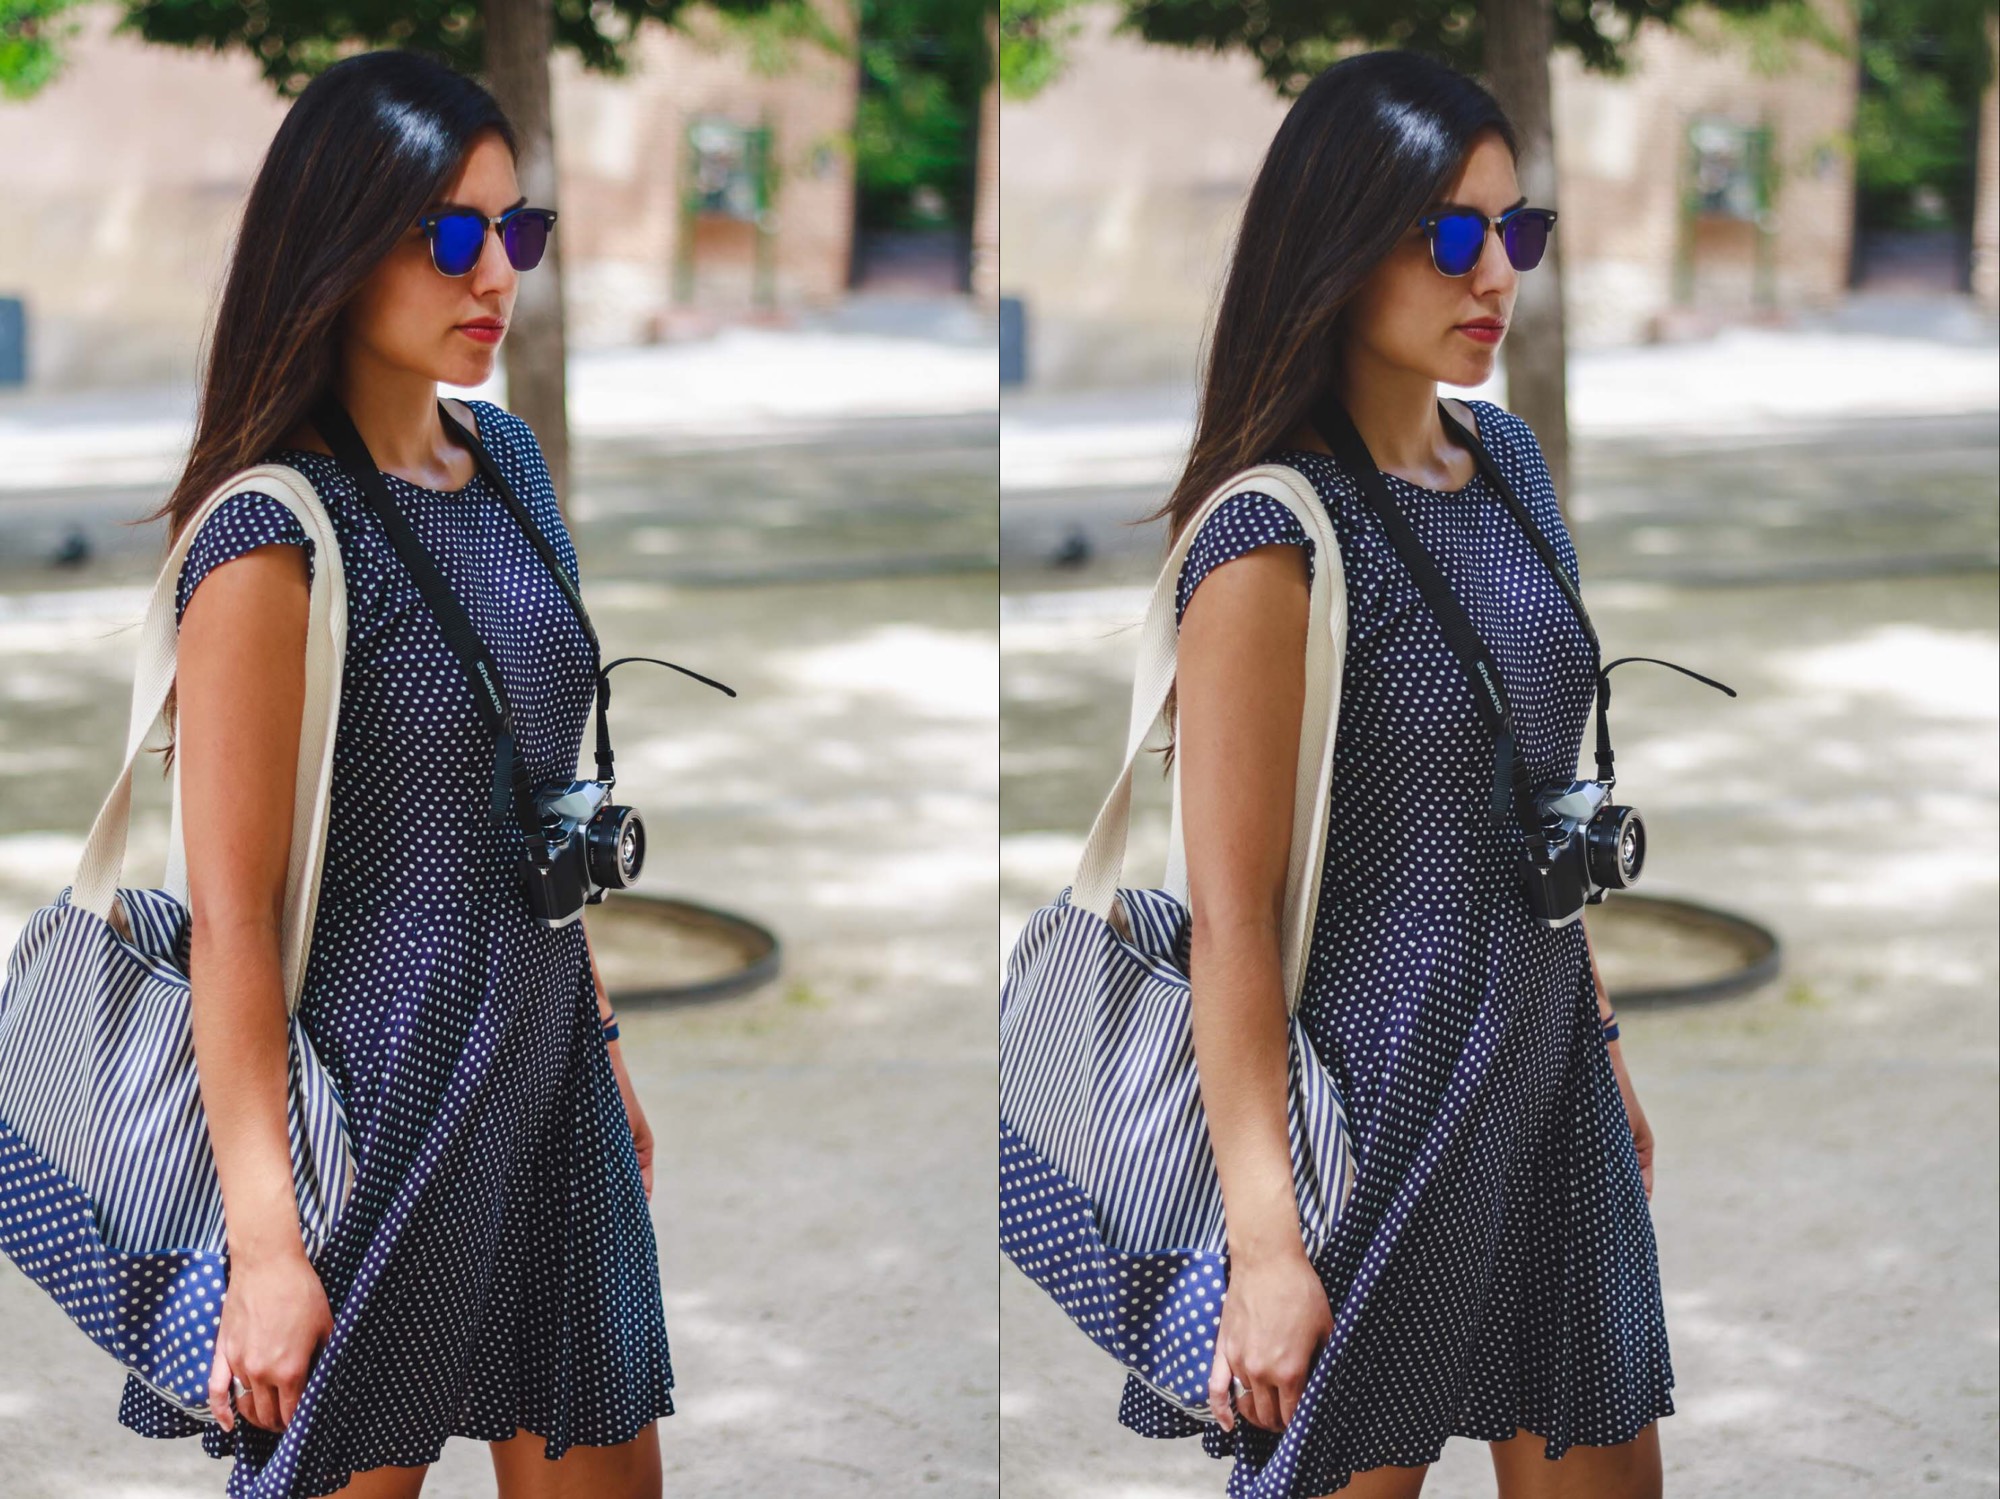
As you may have guessed by now, most of my images had been matched to the Adobe RGB color space when I exported them to JPEG from my RAW files using Lightroom. This caused the weird effect you saw at the beginning of the article. It may sound like an insignificant detail, but the impact it can have on your images is profound. Here’s another example:
Luckily, if you’re experiencing this issue with your own images, there’s a simple way to configure Lightroom — or, I’m sure, your photo-editing application of choice — to make sure we always use the correct sRGB profile when exporting our images as JPEGs. Let’s see how we can do it.
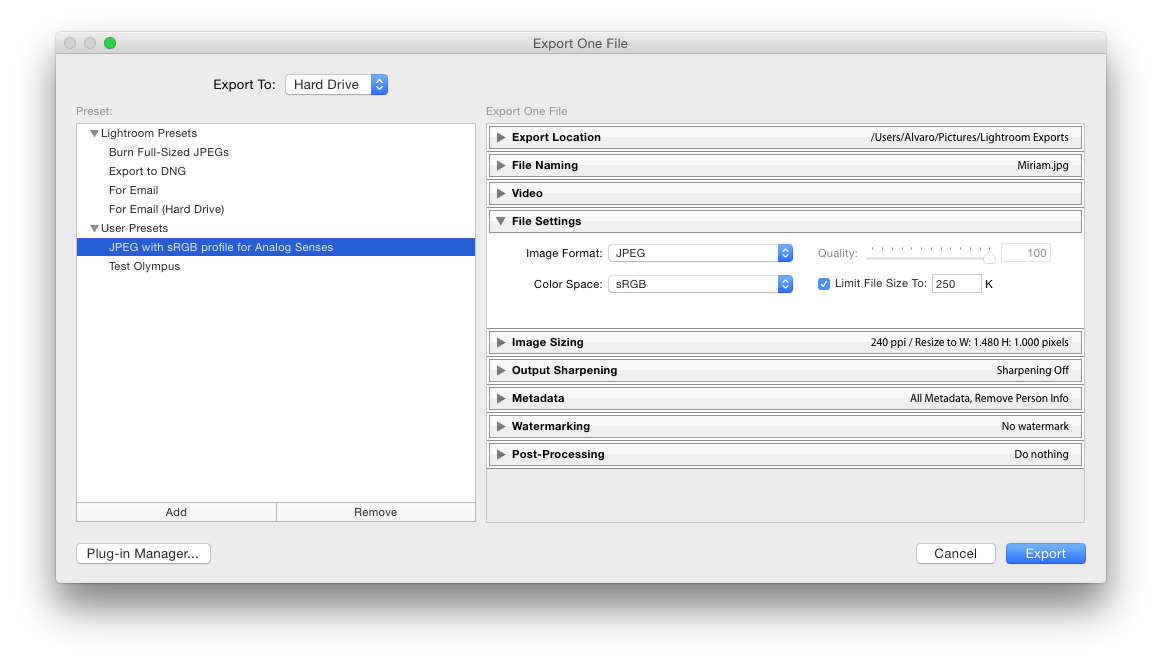
Lightroom’s “Export…” dialog
We access Lightroom’s export dialog via the menu item:
File->Export…
Alternatively, you can use the keyboard shortcut ⇧⌘E.
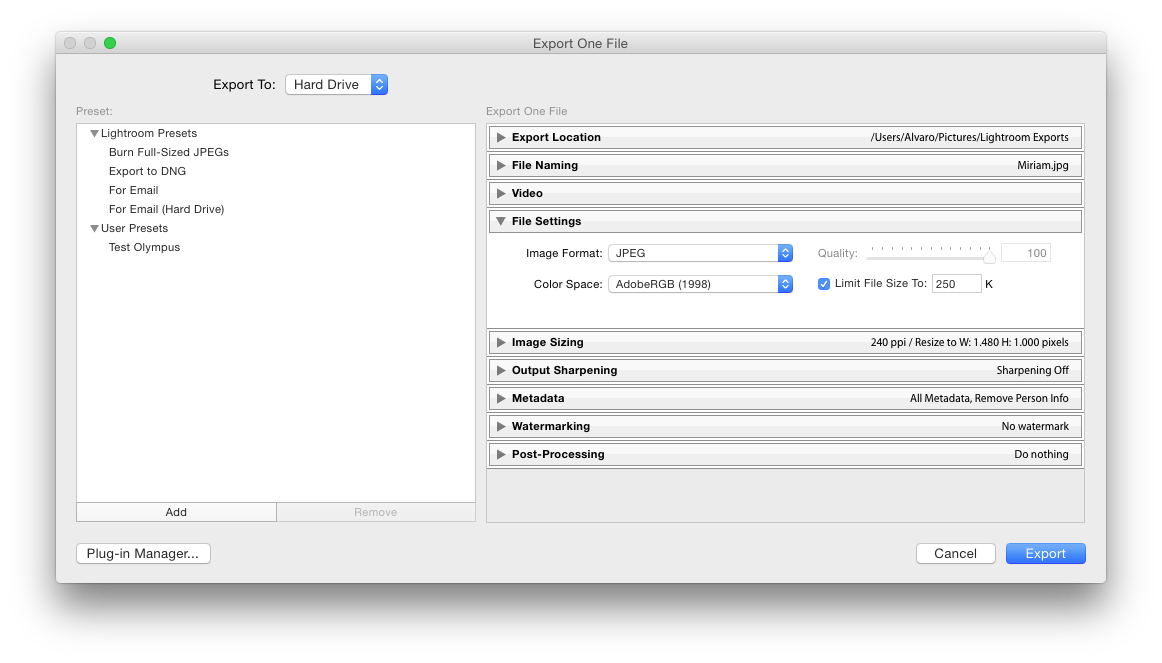
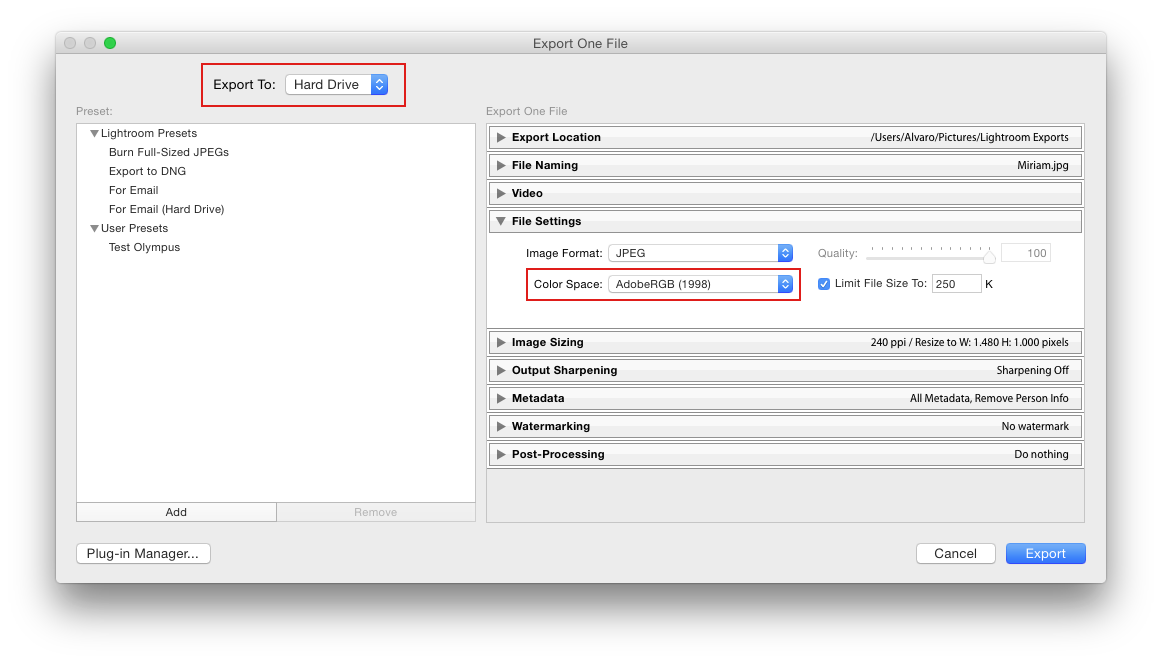
On this dialog, we can configure the export settings for this batch of images, including their size, quality, resolution, name, metadata, etc. Crucially, it is here that we can select the appropriate color space for our files, too.
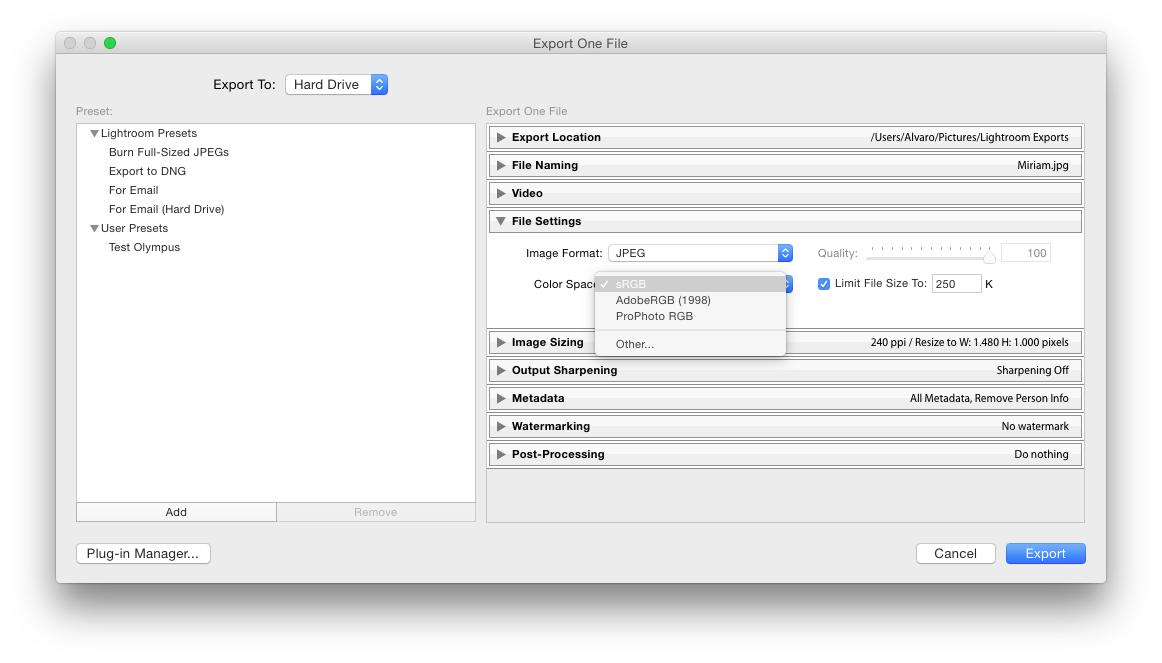
In order to do that, we must set the “Export To” drop-down menu on the top left to “Hard Drive”, and in the “File Settings” area on the right, we must set the “Color Space” drop-down menu to “sRGB”.
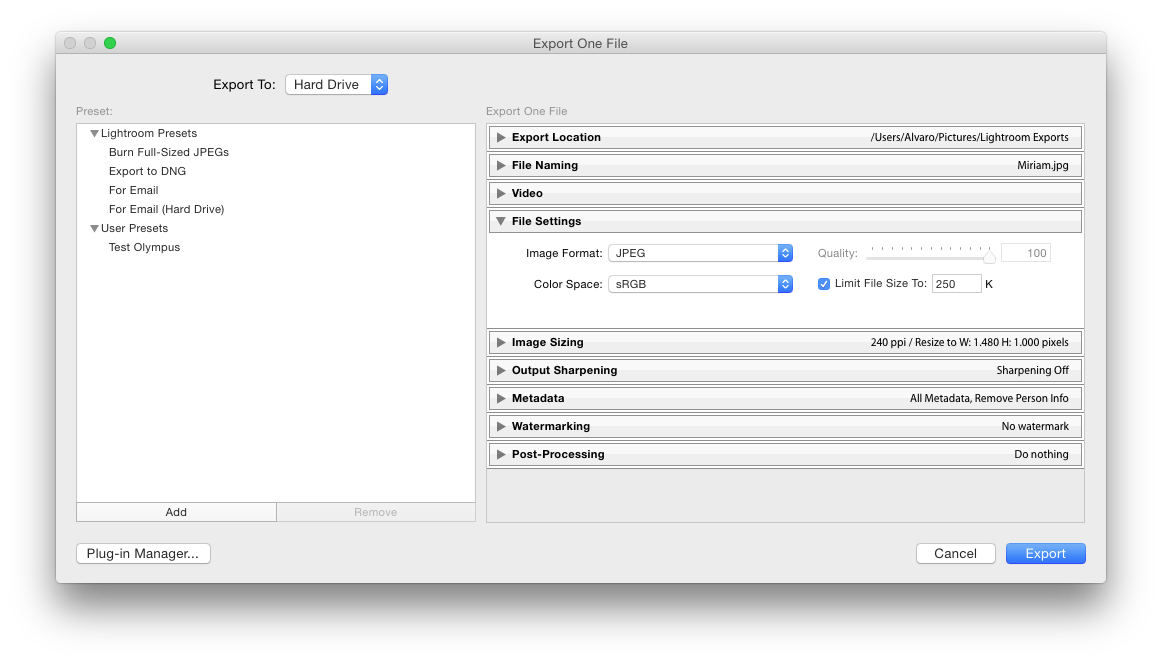
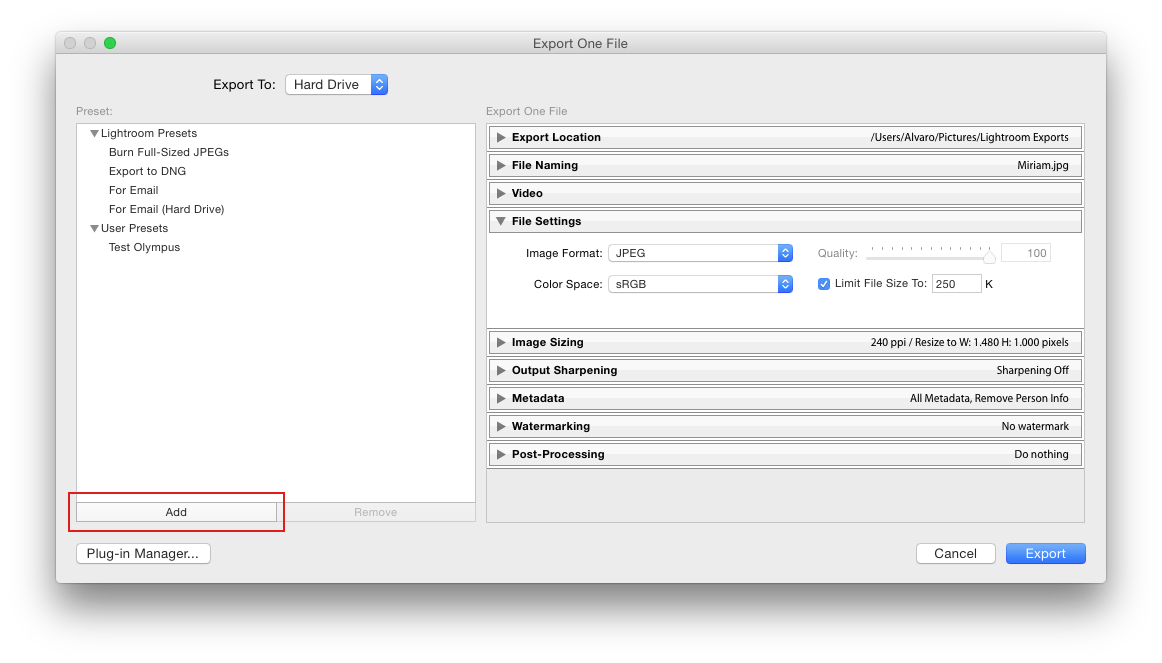
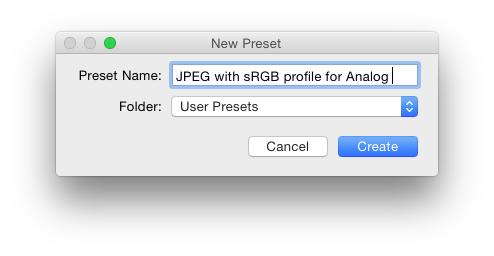
Once we’ve done this, we can save our settings as a new preset by clicking on “Add” in the lower left area, selecting a name for our preset and clicking “Create”. This way we’ll be able to simply select our preset next time we want to export photos, and everything will be properly configured.
And that’s it. As with most obscure settings, it’s really simple to change this one, but you absolutely need to know what you’re doing.
Reasonable expectations
This was one of the most frustrating tech-related issues I’ve experienced in years, in no small part because I’ve realized that all images ever published on Analog Senses — not to mention in my reviews for Tools & Toys — use the wrong color space, and therefore they all look wrong on mobile devices. That’s something that pisses me off to no end.
Solving this problem was not technically difficult, but it required a level of research and technical reading that I’m not sure most people would feel comfortable doing. There needs to be a better way to approach color management on iOS, one that works for all users, not only those technically savvy enough to navigate their way through Apple’s obscure support document library.
What I find most appalling about all this is that by design, the burden to make sure our images are matched to the correct color space falls squarely on us, the users. This may make sense from an engineering and resource-consumption standpoint, but from a user experience point of view, it leaves much to be desired. In general, I can’t help but feel that color management is something that should always happen automatically behind the scenes.

This is how colors should always look.
It may have required a wild dose of ignorance and bad luck together for me to run into this issue, but I don’t think it’s unreasonable for normal users to select the Adobe RGB color space when prompted to choose one by Lightroom, simply because it’s probably the only one that sounds vaguely familiar to non-tech people.
Moreover, since the difference is not immediately obvious on a computer screen, most users probably won’t realize what’s happened until they view their images on a mobile device, and by then it may be too late to do something about it.
If you want to make sure your images are always displayed accurately on mobile devices, follow the above steps (or find the appropriate ones for your photo-editing application of choice) to make sure you’re always using the sRGB color space when exporting your images. Yes, it’s a small additional step to add to your workflow, but it may save you a ton of headache down the road.