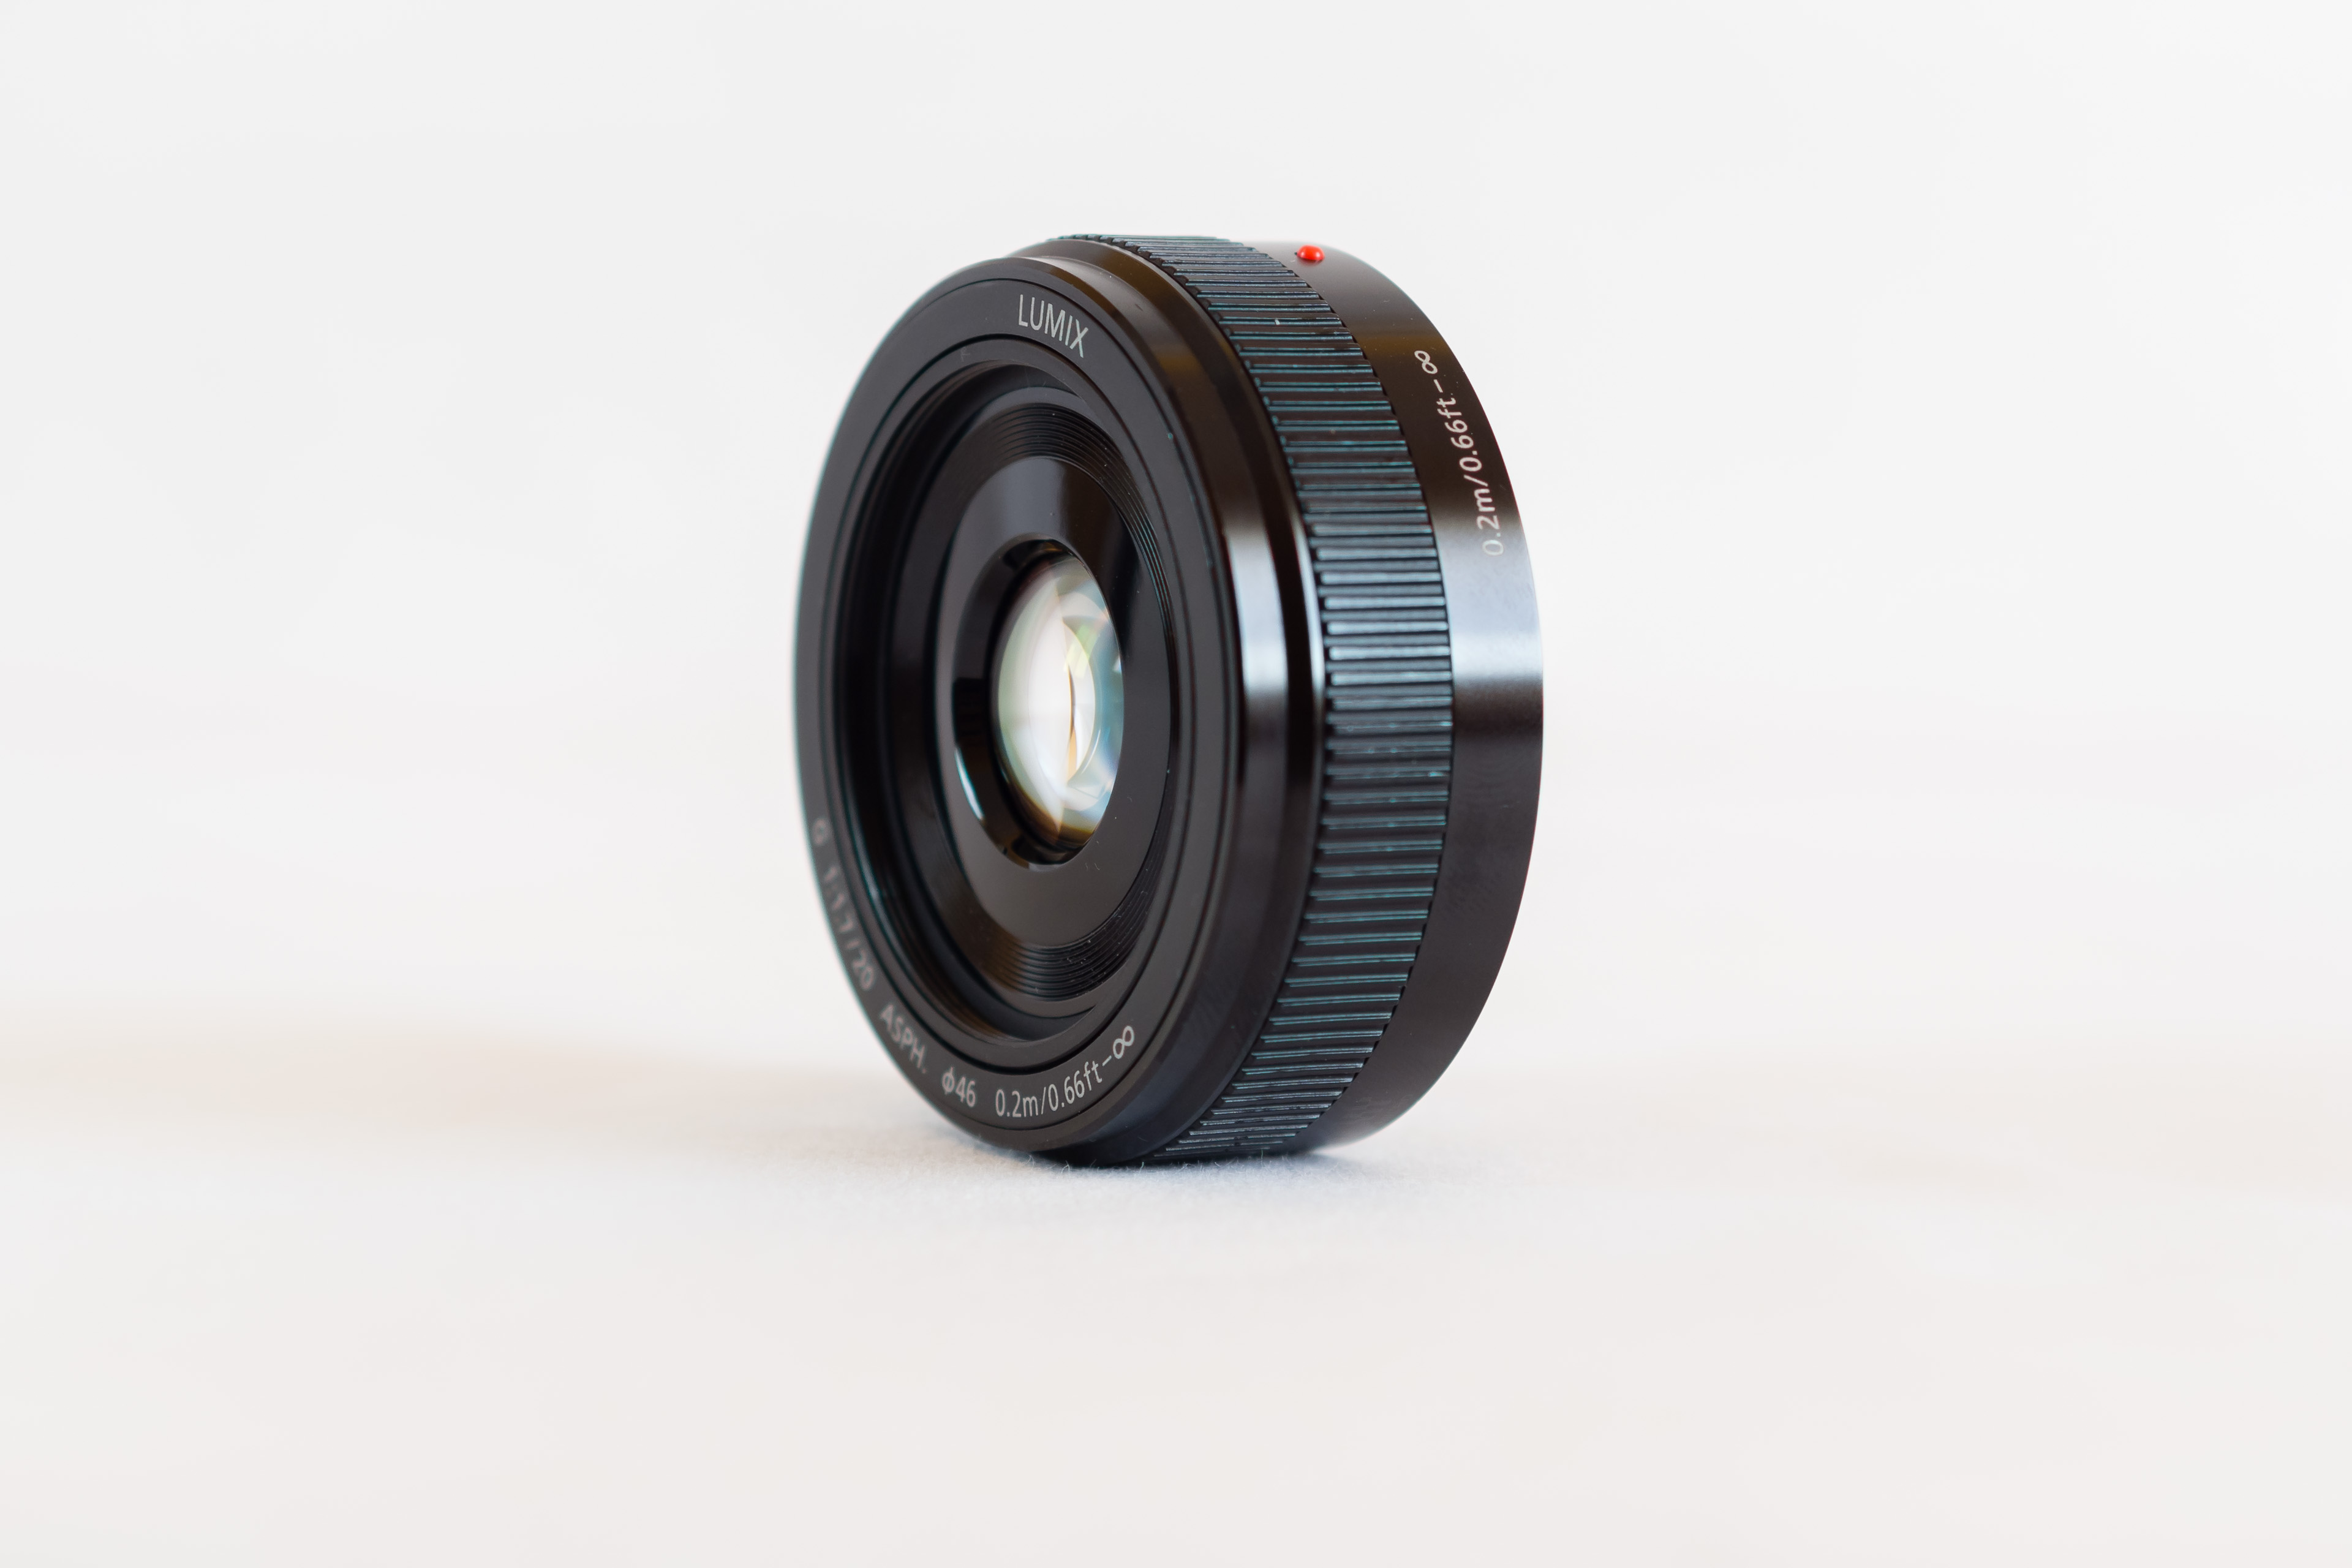
In my review of the Panasonic 20mm f/1.7 Micro Four Thirds lens for Tools & Toys, I tried a few new things for my product shots. I usually take these shots at home, in a variety of different real-life scenarios. Those tend to work well for the type of reviews we do at Tools & Toys, but there’s also something I really like about professional product shots. This time around, I wanted to try my hand at it and see what I could come up with.
My goal was to replicate the studio look you often see in professional product shots, so I decided to go for the same “white-room” look that my friend Josh Ginter often uses in his own product reviews.
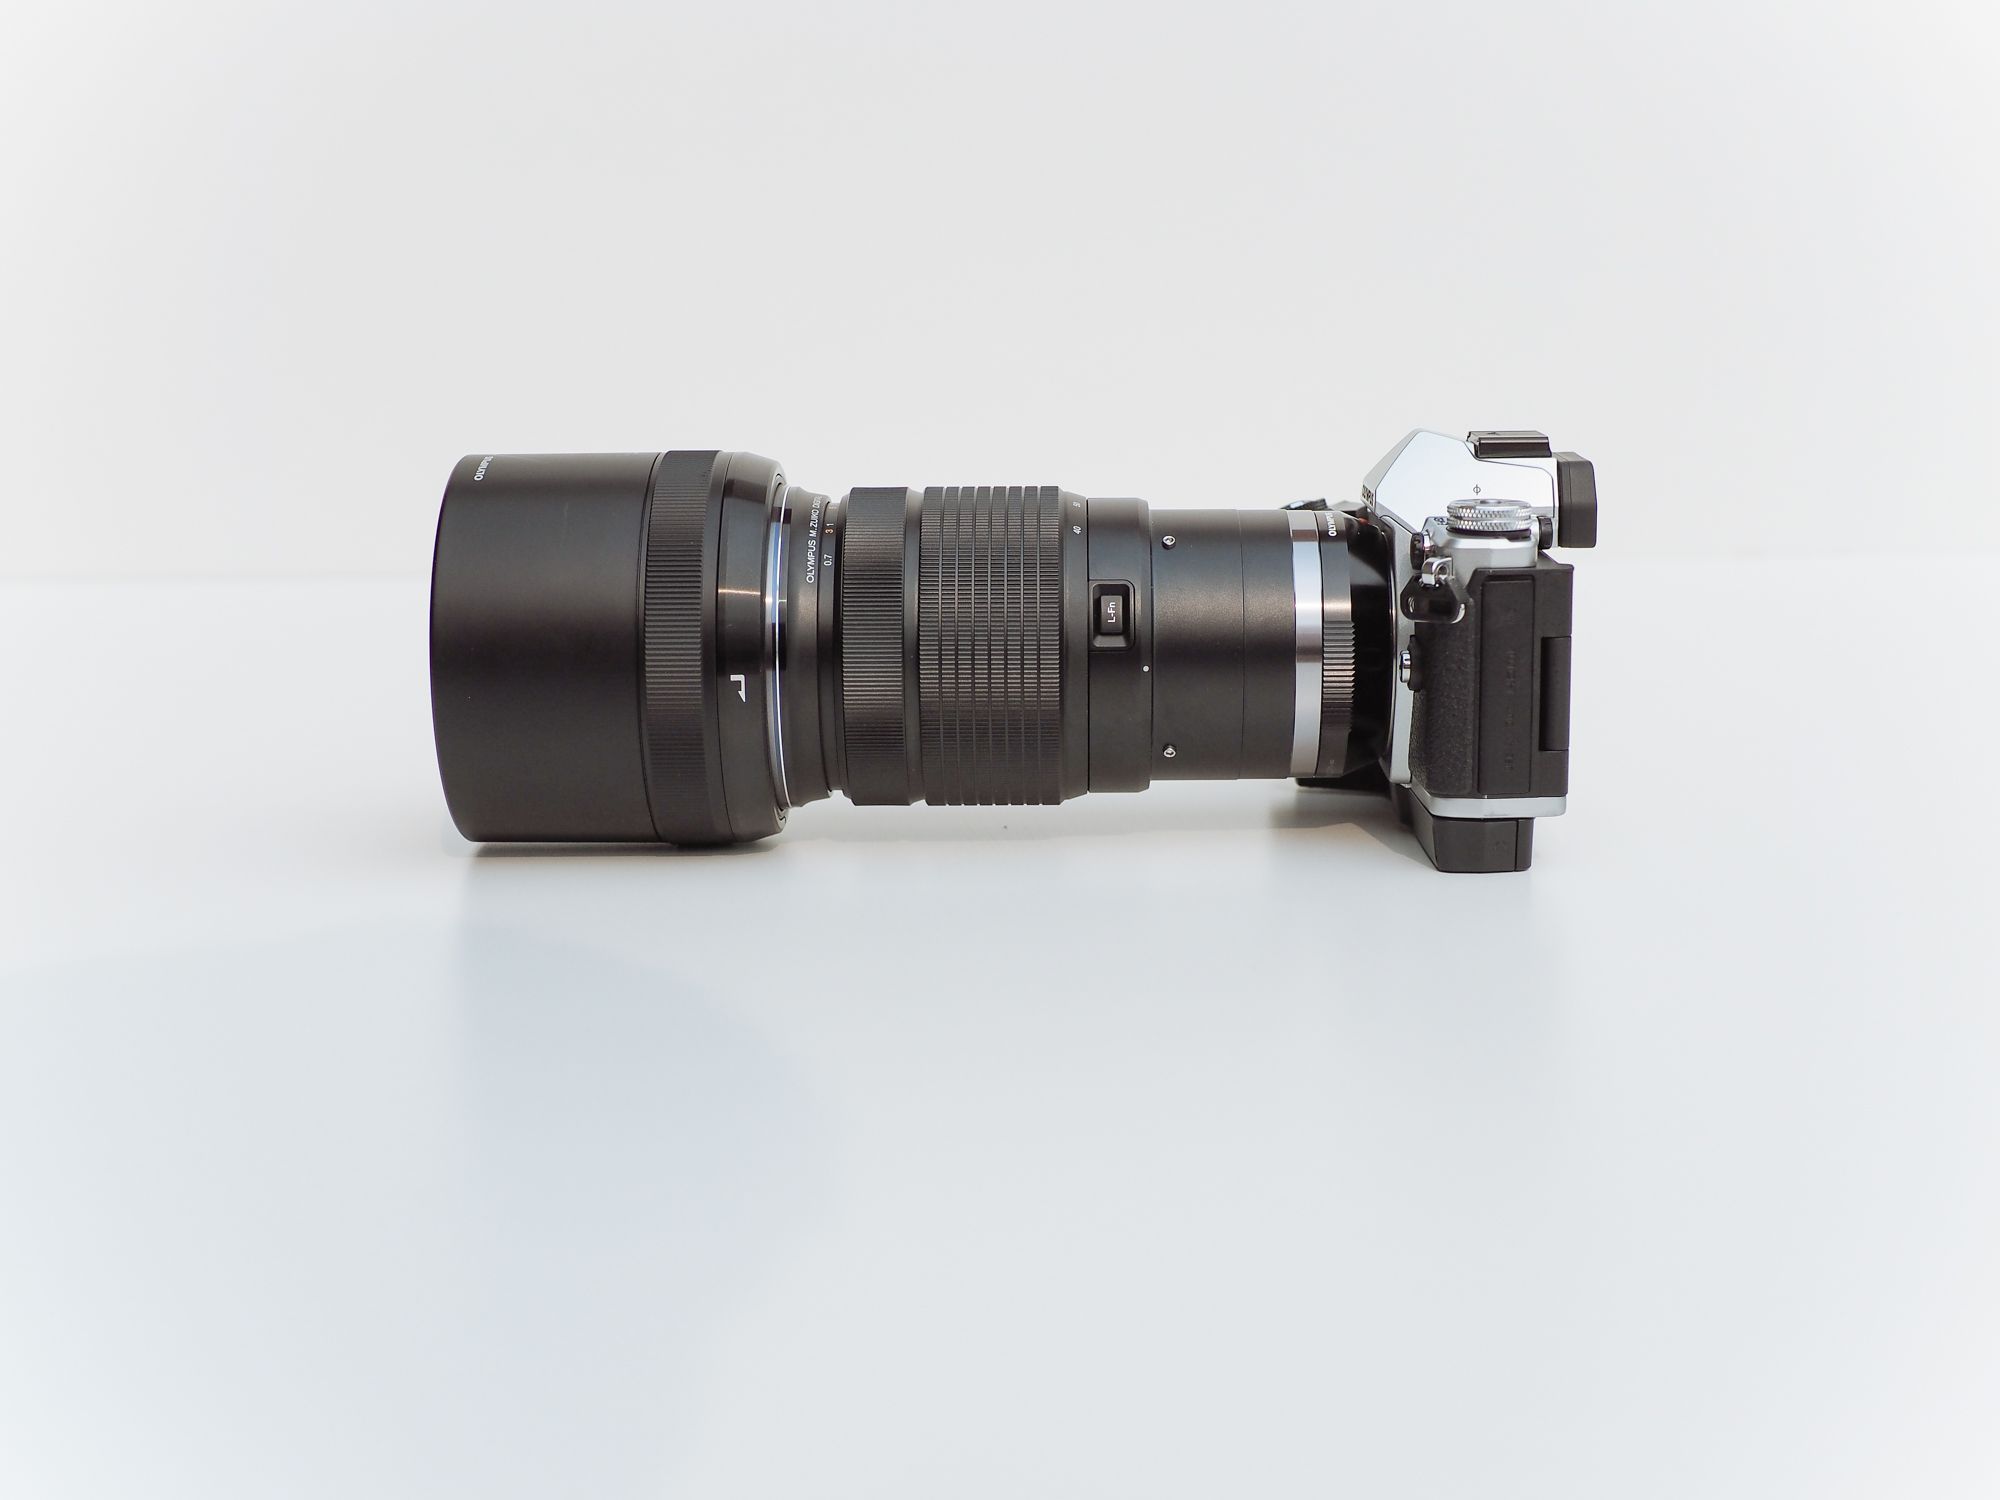
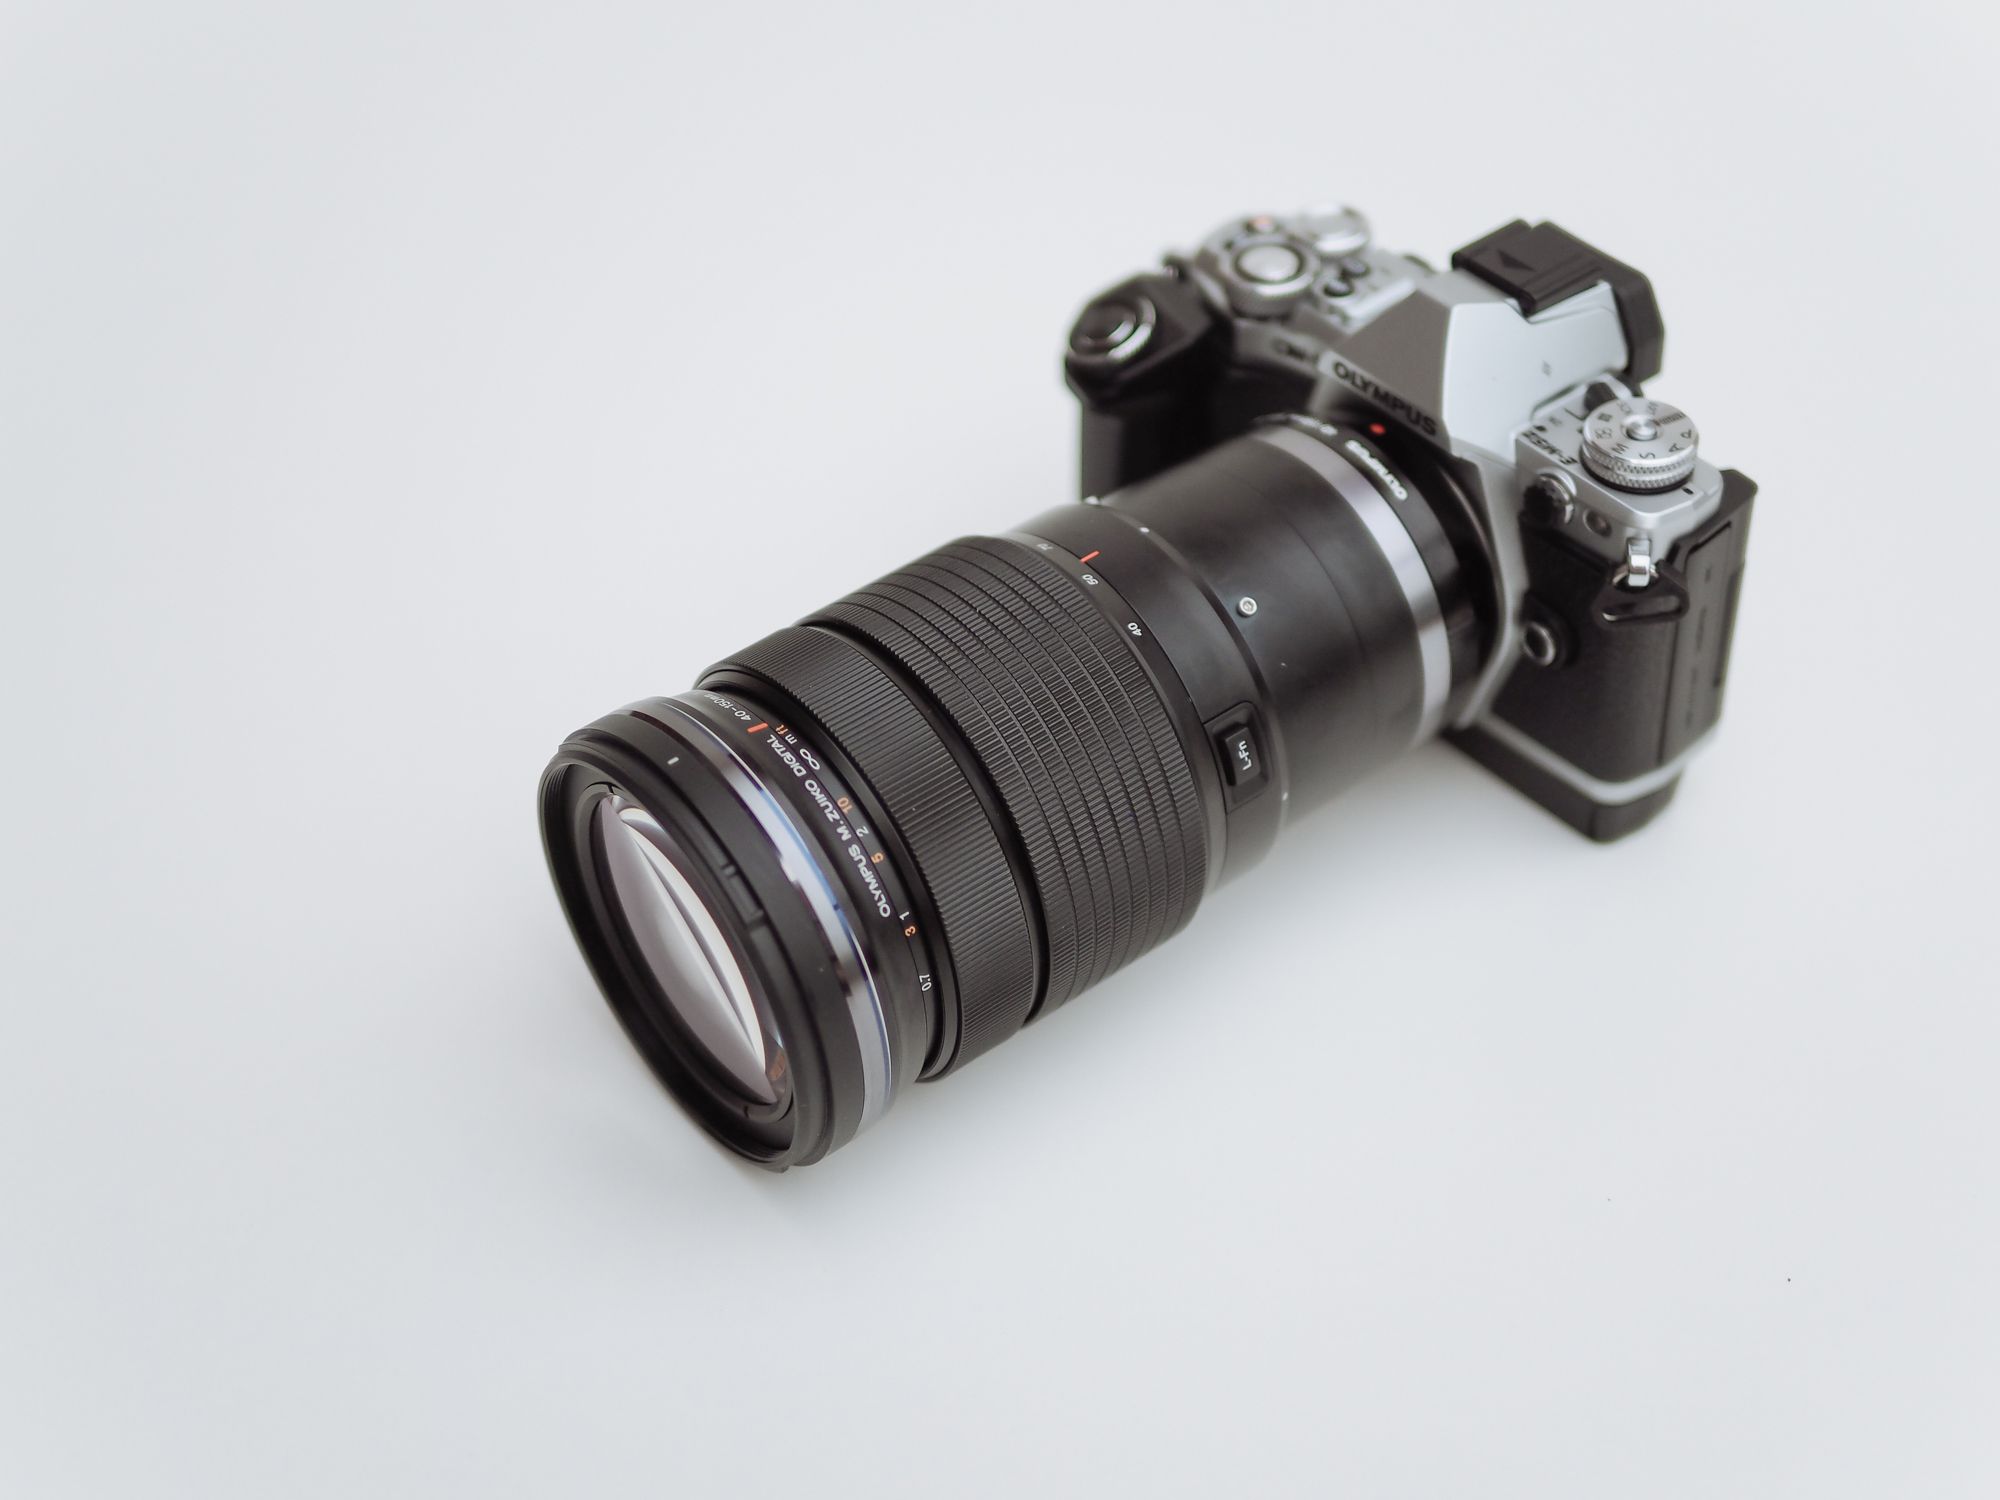
The Olympus 40-150mm f/2.8 PRO zoom. Images courtesy of Josh Ginter.
There are several ways to achieve this look, the most obvious one being shooting them in an actual studio with proper studio lighting and a solid white backdrop. Luckily, if you don’t have access to a studio or lack the financial means to rent one, there are other alternatives you can use to get about 90% of the way there without spending a dime. All it takes is a little improvisation and some clean-up work in post production.
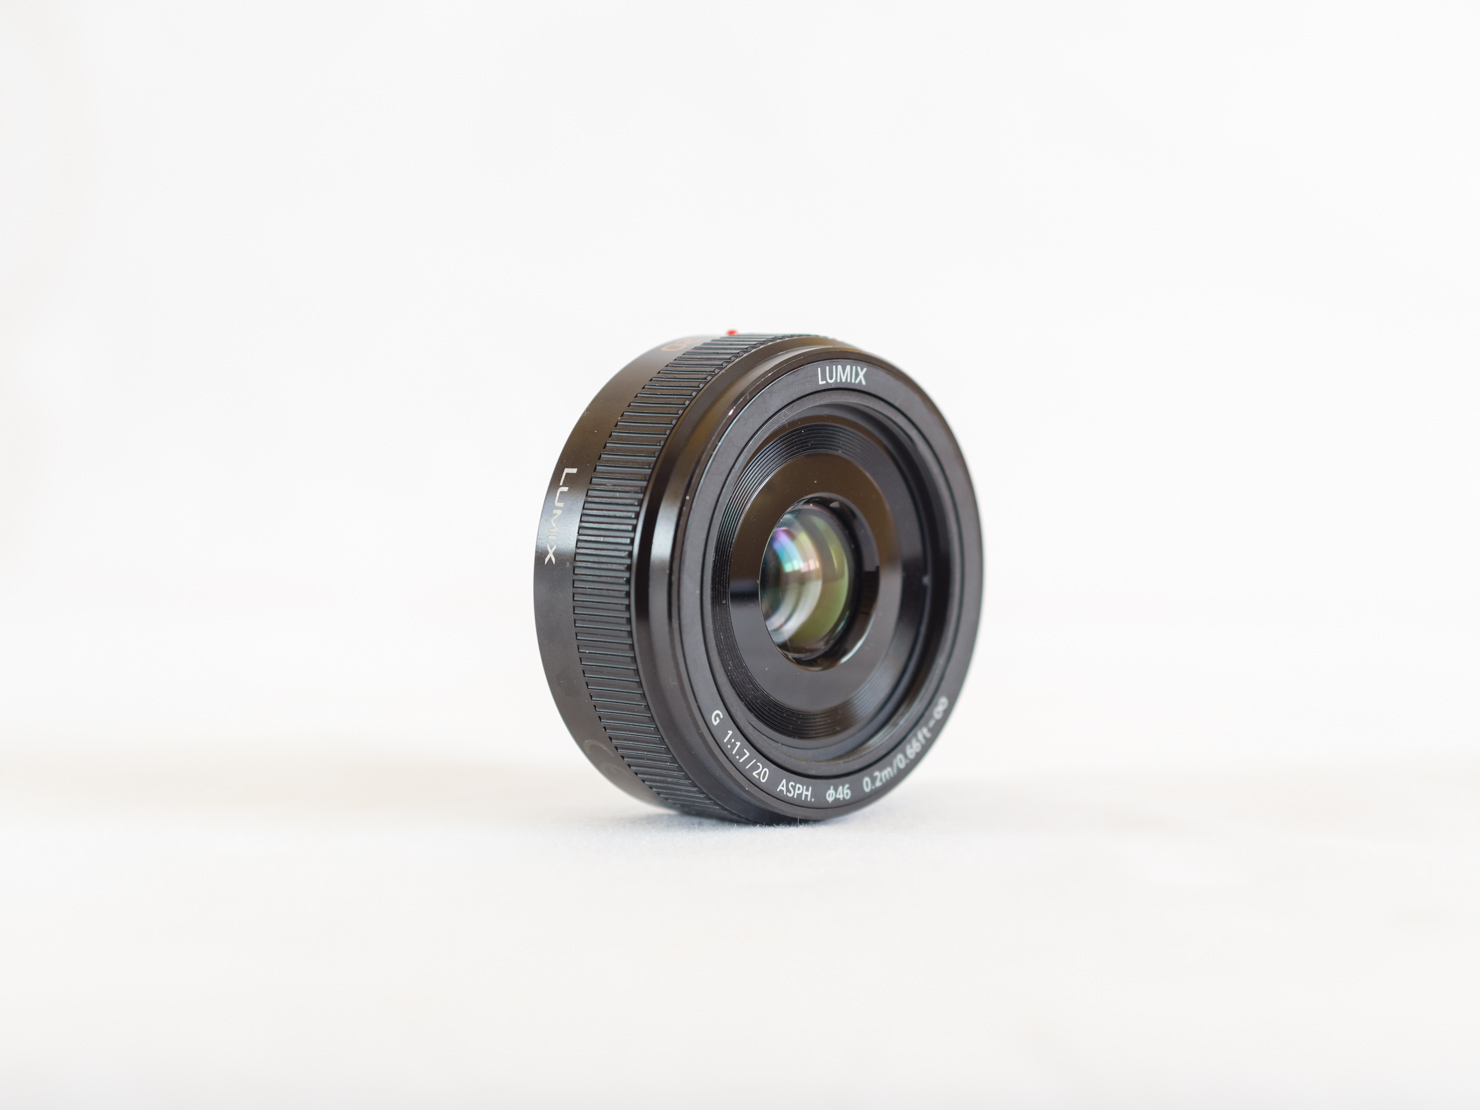
The end result, I believe, stands up fairly well to scrutiny.
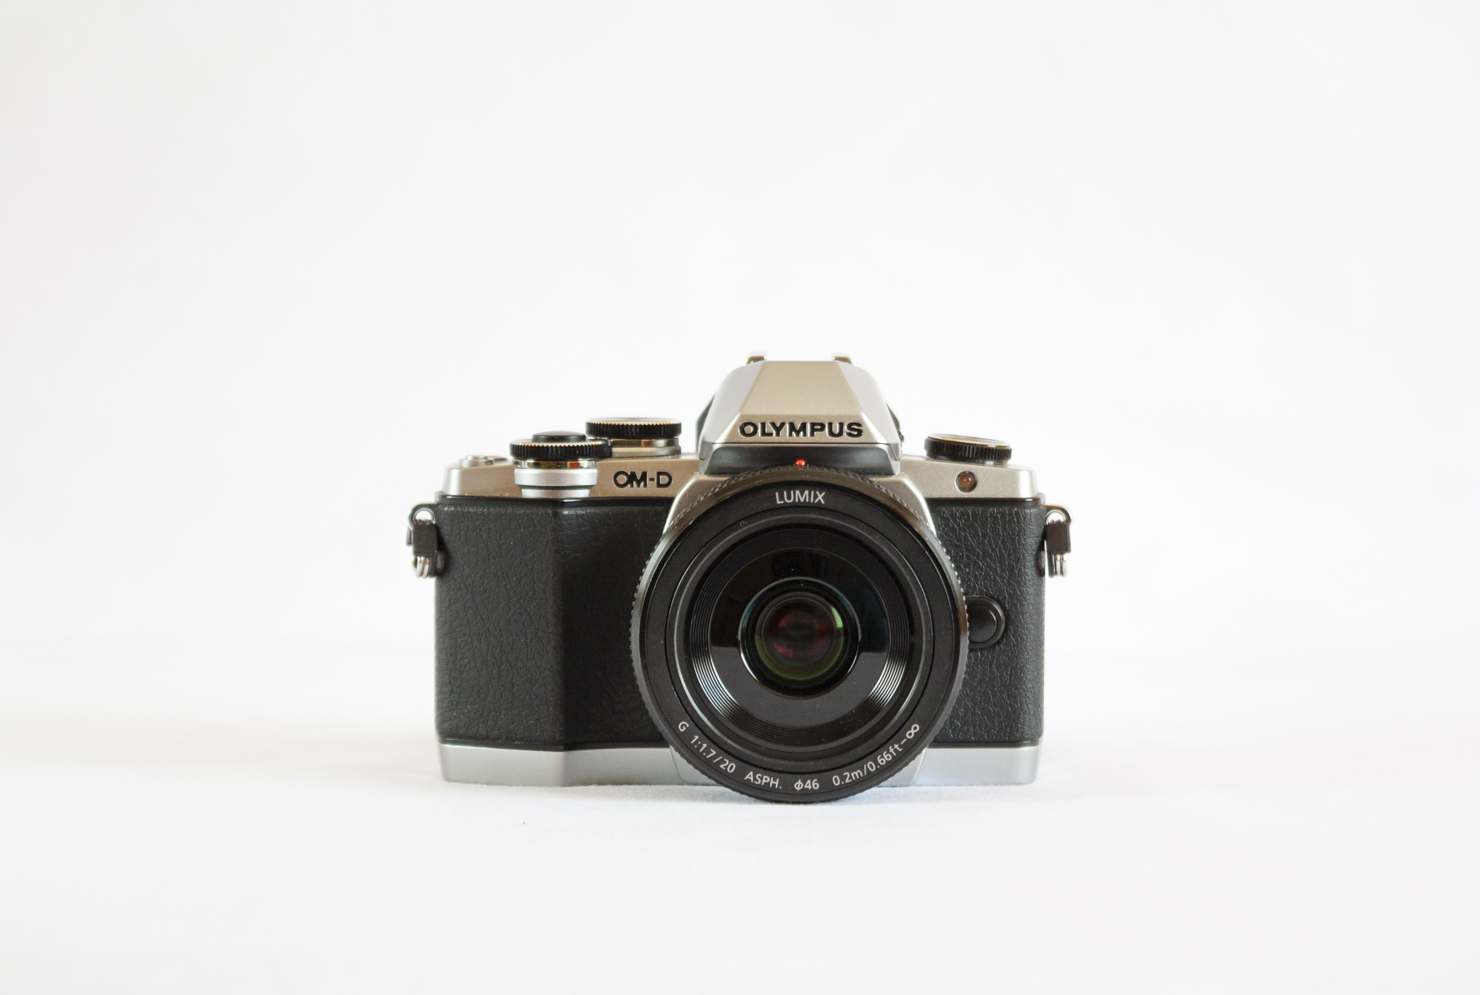

Not too bad, is it? Now, let’s take a closer look at what it takes to get these results.
Necessary gear
In order to get a studio-like look in your product shots, this is what you’ll need:
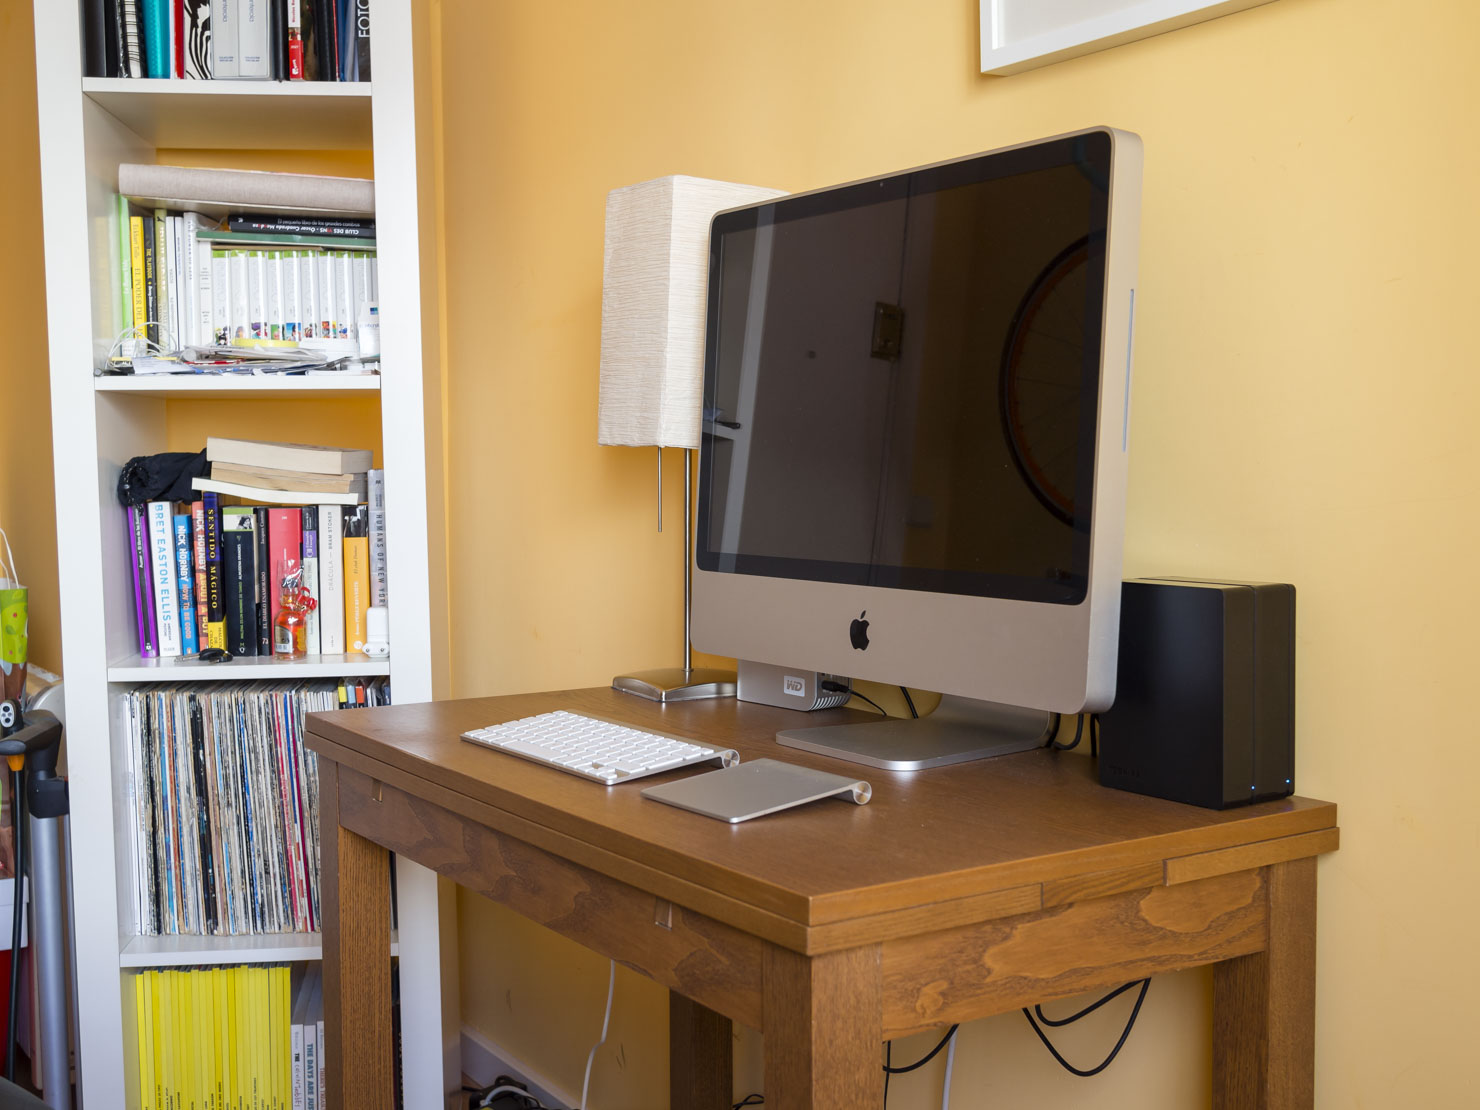
A fairly spacious surface to work on, preferably a desk or something similar.
A window next to which we can set up our workplace.
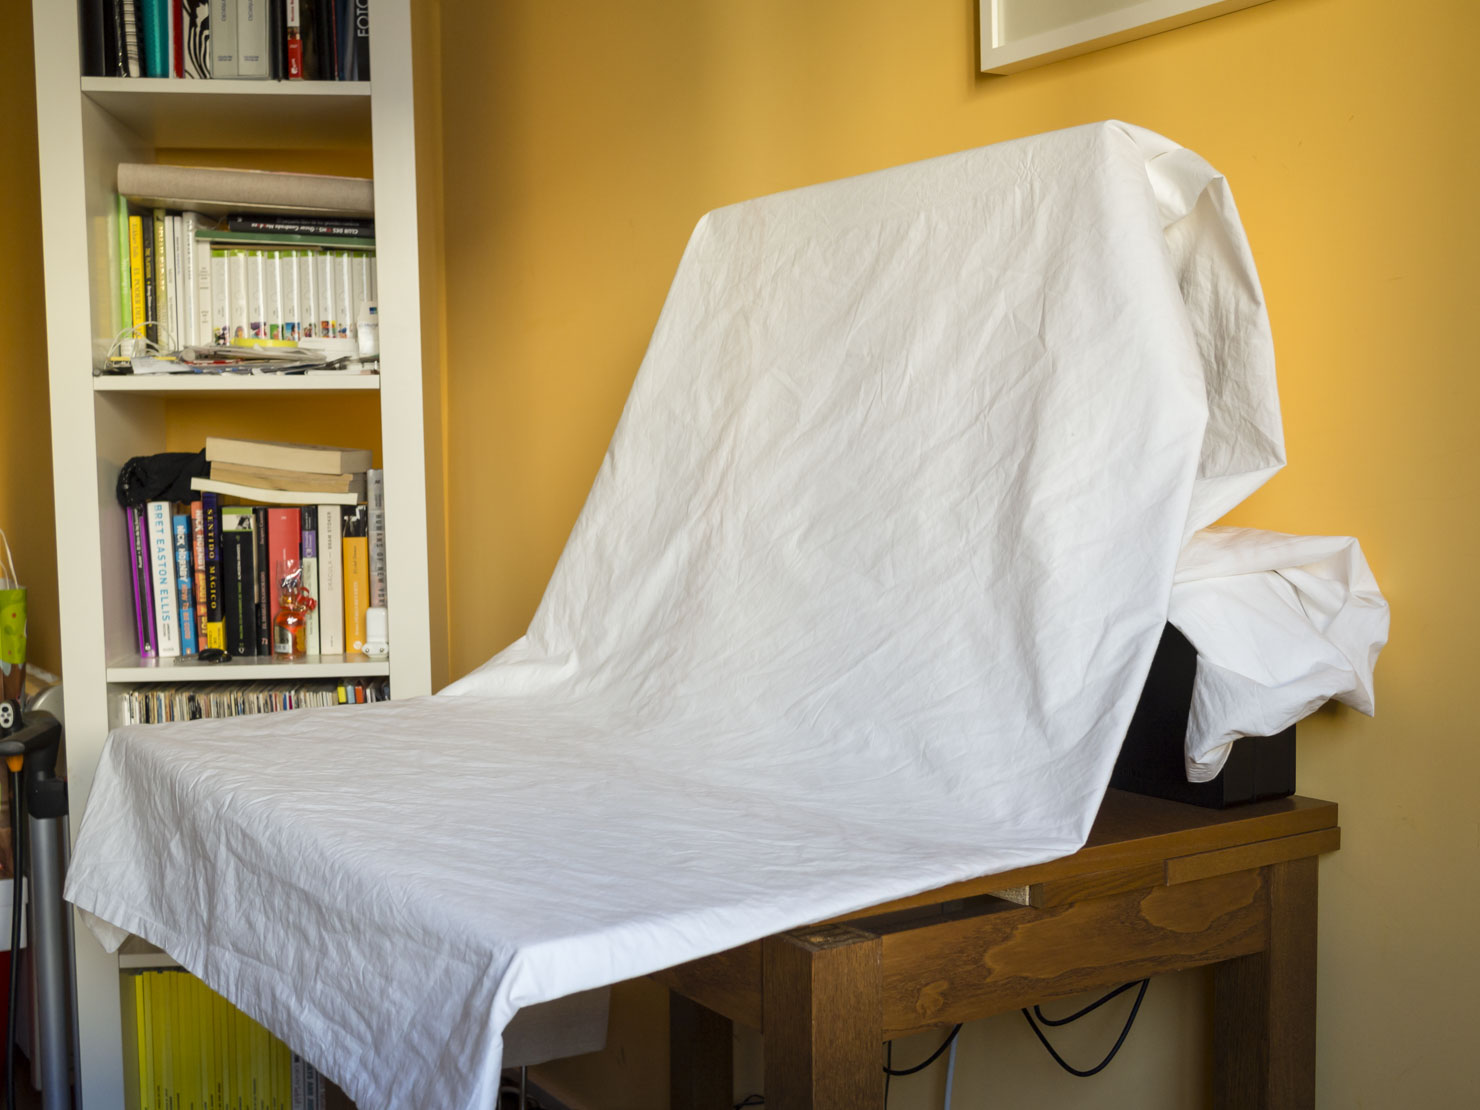
A large piece of solid white fabric —or your color of choice — which will act as our backdrop. It must be large enough to cover the entire desk and not have much texture to it. Think of bed sheets, for example. Of course, there are actual studio backdrops you can buy and use, and they’re not particularly expensive, but in a pinch, bed sheets will do just fine.
A flat object we can prop up on our desk, creating a vertical surface to hold our backdrop in place. A computer screen, a television, a framed picture or something along those lines will work perfectly.
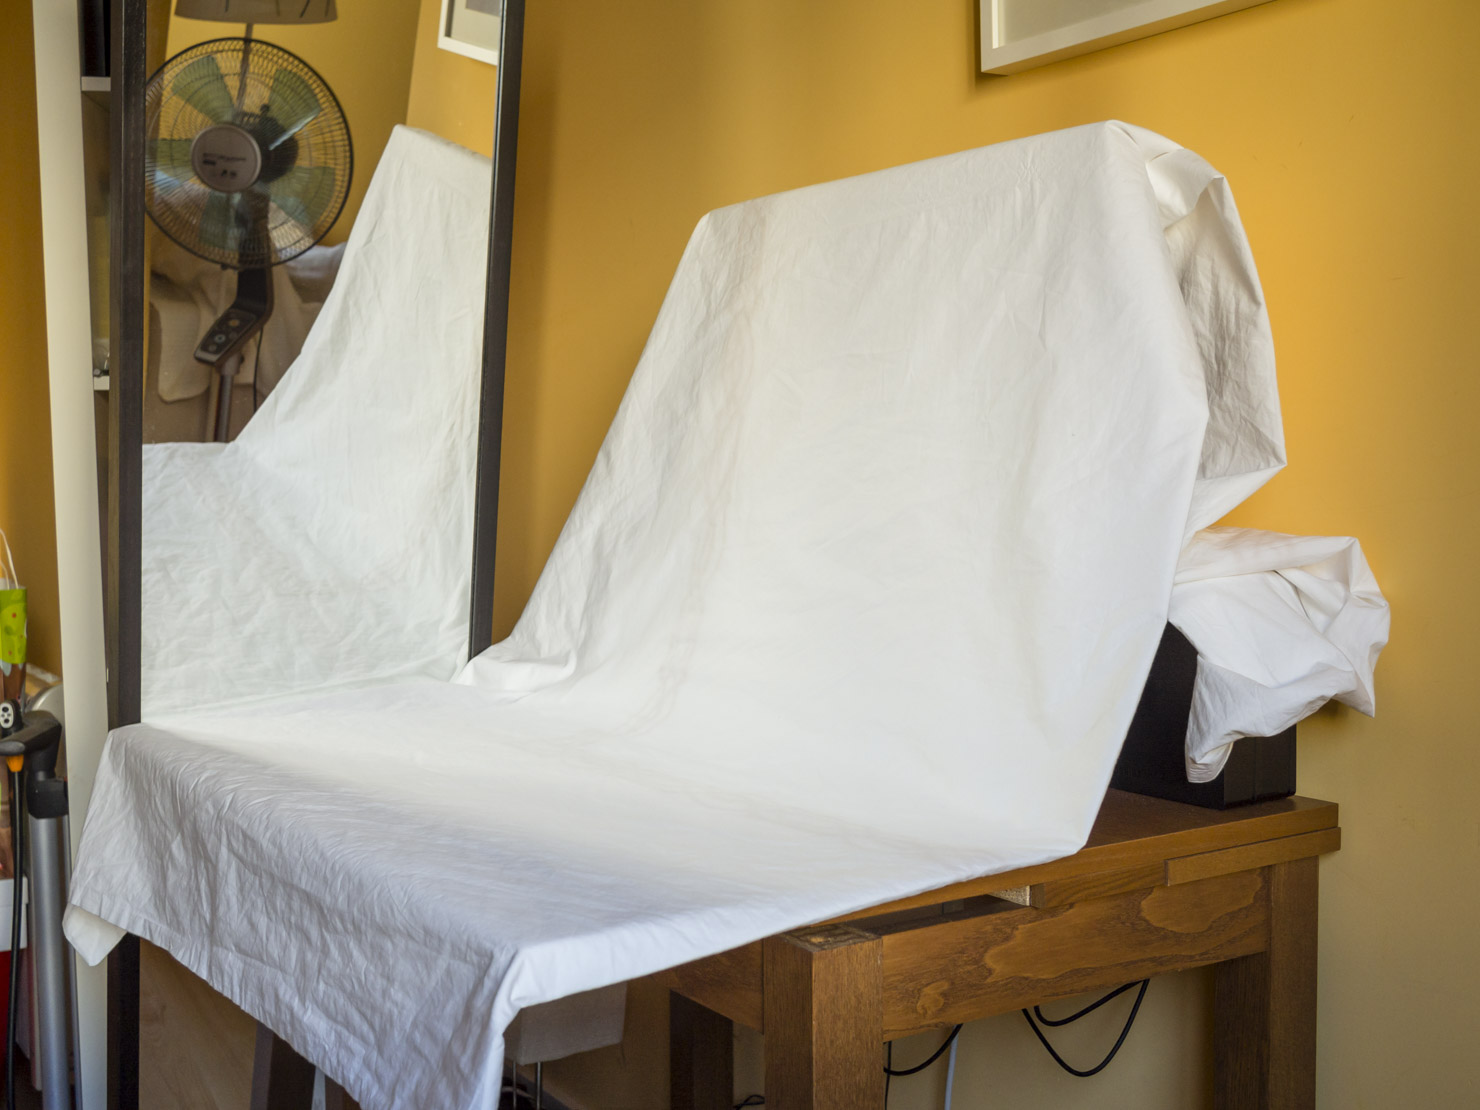
A large, reflective surface we can use as a reflector to minimize shadows. If you have a large standing mirror, that’s about perfect. If not, any smaller mirror or even a solid white surface will do.
Optional: If there’s not much light in your room or you want to keep the same framing across several shots, you will also need a tripod.
Optional: A second set of bed sheets to act as a diffusor.
A photo-editing application, like Adobe Lightroom.
That’s pretty much it. Now let’s see how we can use all of this to create our own studio at home.
Setting everything up
As you may have guessed from the list above, the procedure is actually quite simple. We set up our desk next to a bright window, if possible at the brightest time of the day. In order to scatter the light and reduce shadows, we will need to cover the window with some semi-transparent material to act as a diffusor. This is where the second set of sheets may come in handy if your window doesn’t have blinds on it.
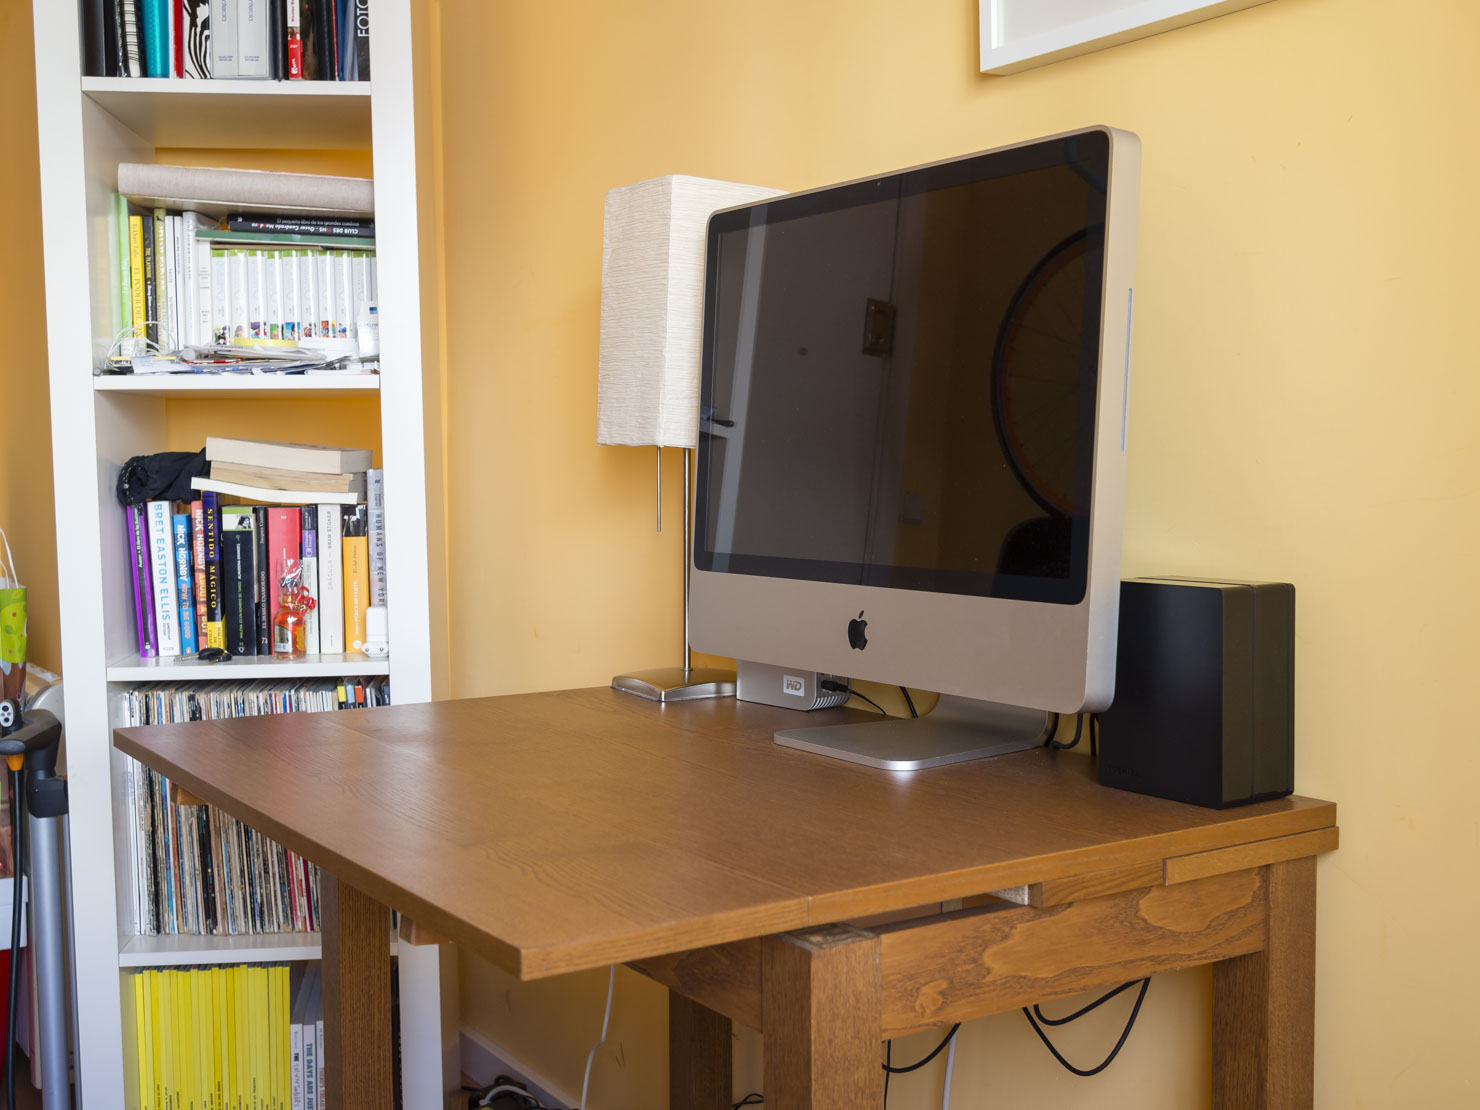
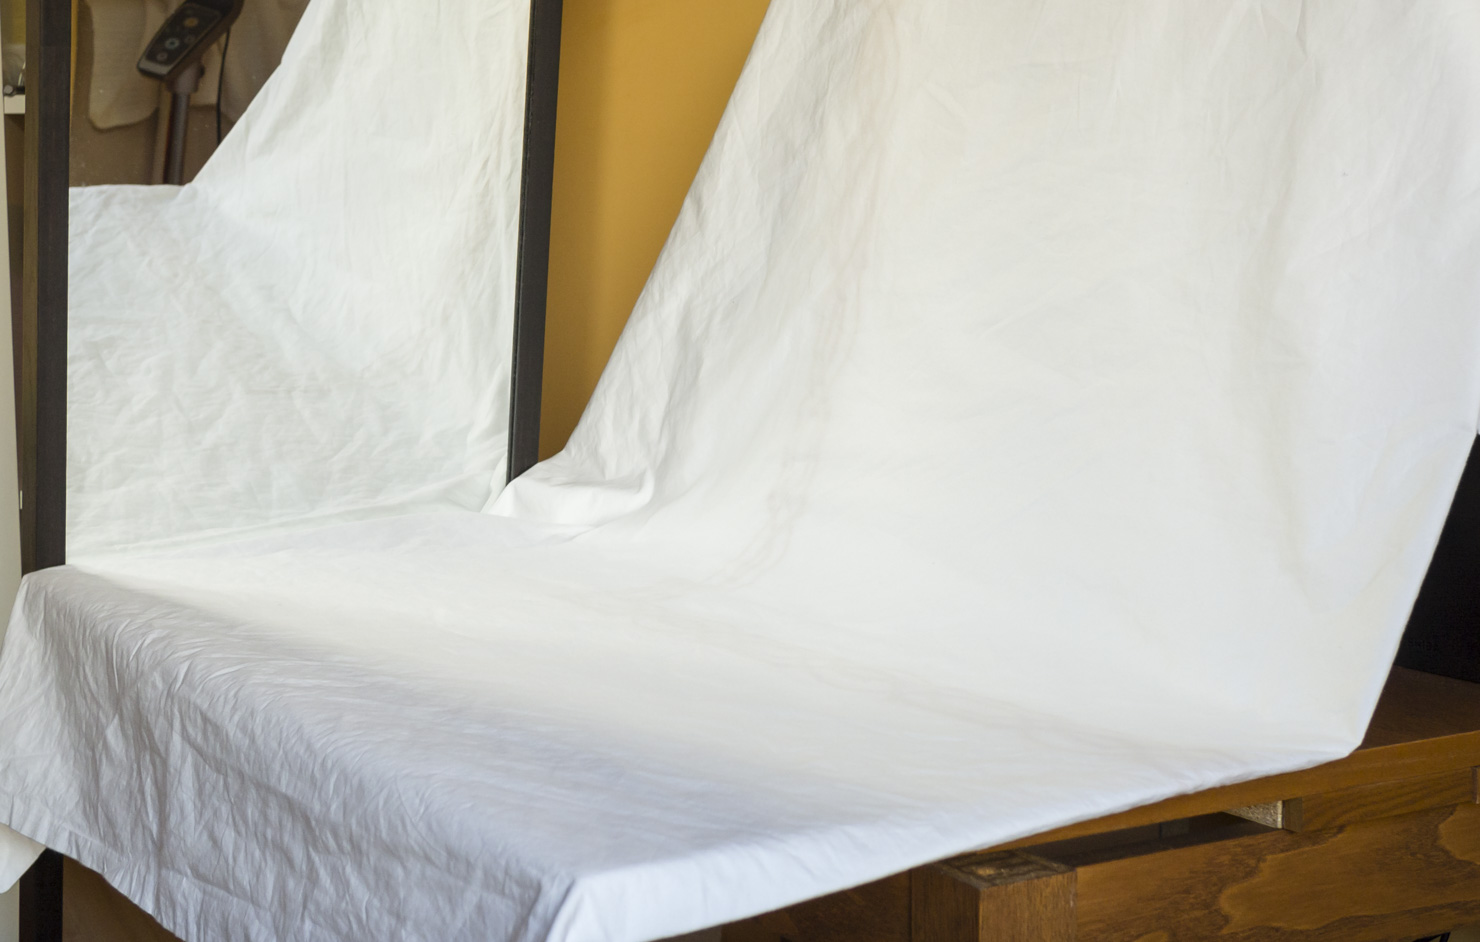
Then we place our flat object on the desk resting up agains the wall to create a vertical surface on which to prop up our backdrop. In my case, my 24" iMac provided just about the perfect solution, since it stands on its own and doesn’t need a wall to lean on.
We then need to place our backdrop over the vertical surface in such a way that it covers the entire working surface, with some excess fabric left hanging over the sides and the front. If you’re using bed sheets or something like that, make sure to fold them a couple times to increase thickness and then give them a thorough ironing to minimize wrinkles. This will make out post production stage a lot easier. Also, be sure to place it in such a way that makes the intersection between the desk and the stand look seamless.
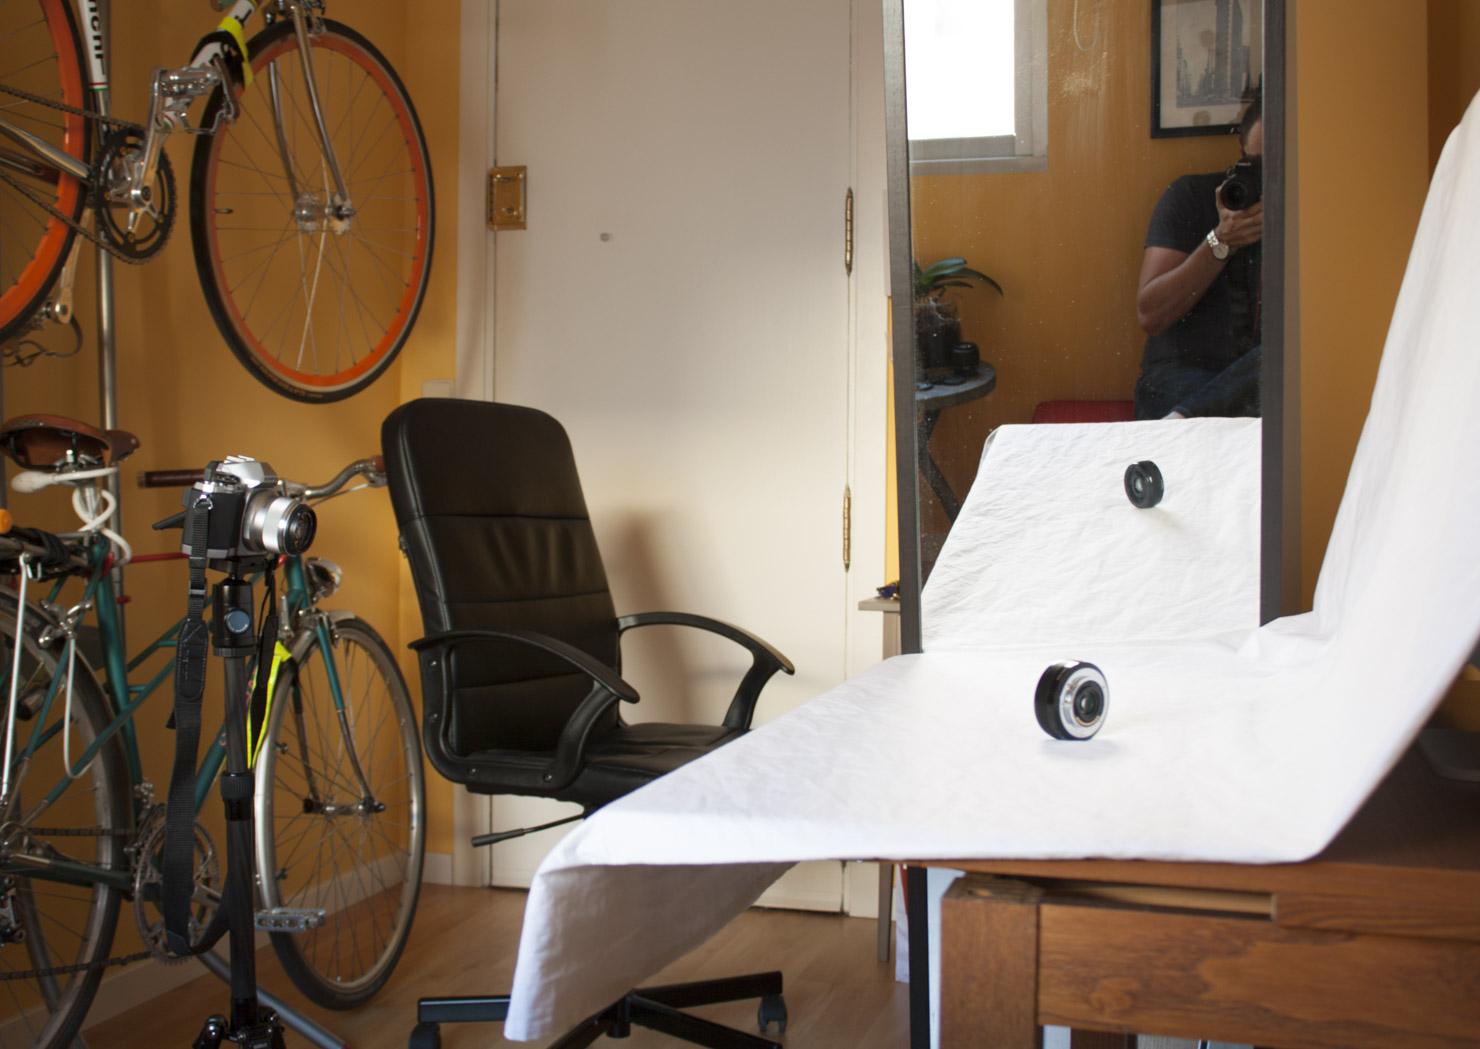
Once the backdrop is in place, we need to set up our homemade reflector at the side, placing it opposite the window. This will reflect available light back on our working surface, giving the illusion of a second light source in the scene and eliminating excessive shadows.
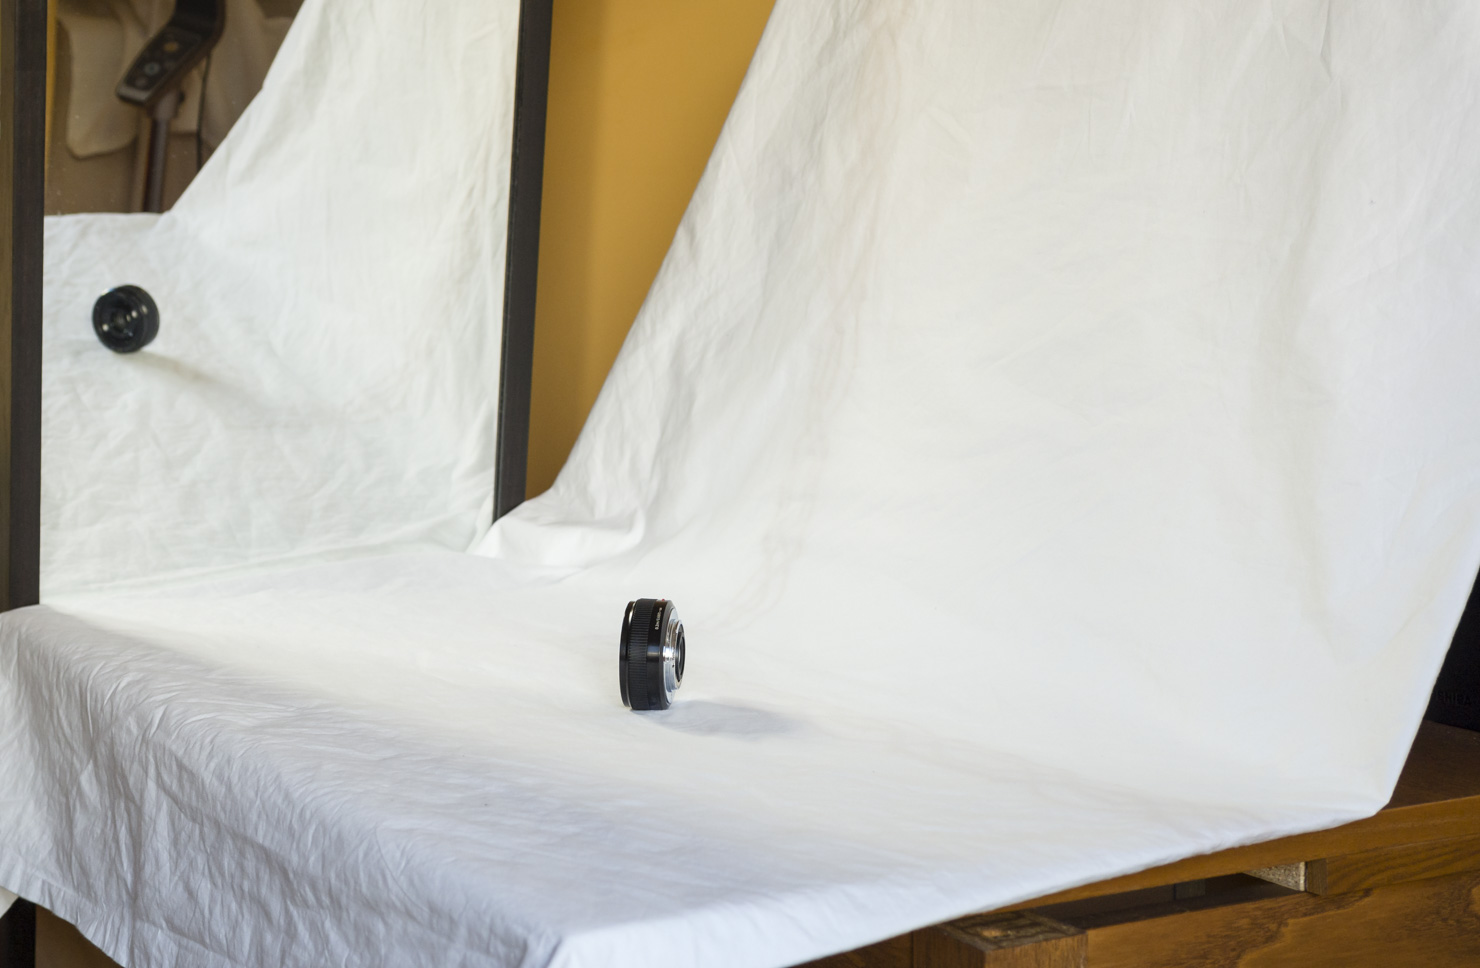
Once we have everything set up, we place our product on the working surface. Try to position it closer to the edge than to the backdrop, that way it will be easier to blur out the backdrop and give it a more uniform and less distracting appearance.
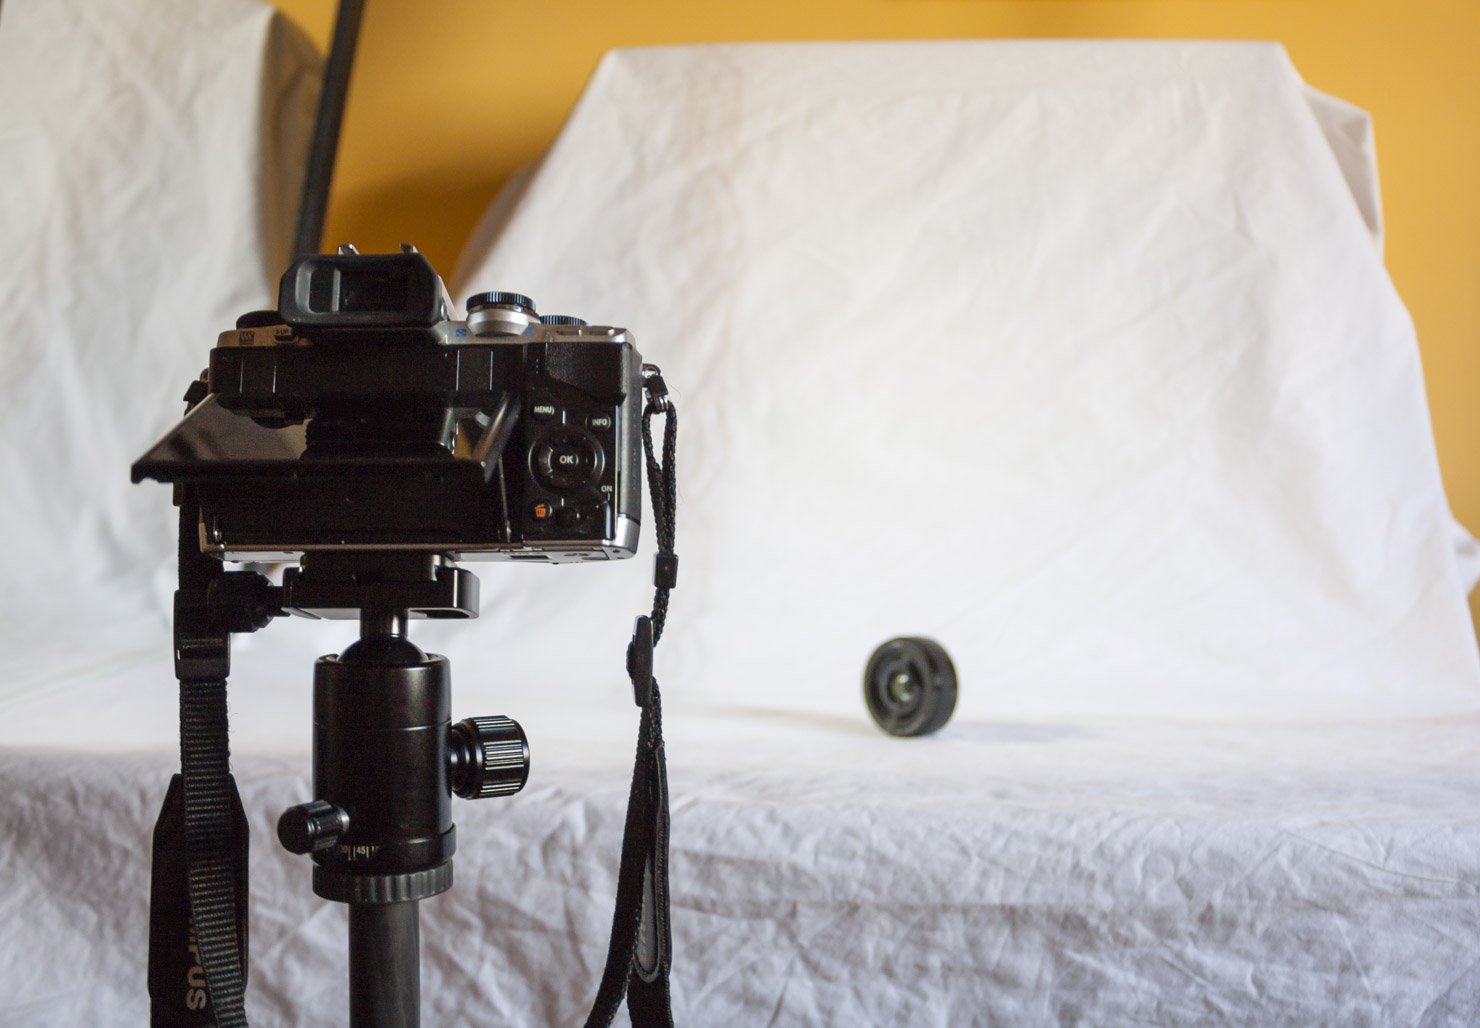
Finally, we set up the tripod in front of our working surface and fire away.
Shooting tips
In case it wasn’t clear, this article is not intended as a how-to guide to product photography. There are a million important aspects I haven’t even mentioned here that you should pay attention to. That said, this technique will give you a decent alternative for those situations where accessing a studio is just not feasible. With that in mind, here are a few general-purpose shooting tips you may find helpful:
Place the camera as close to your subject as possible while retaining proper framing. This will reduce depth of field and help separate the product from the background, which is ultimately the goal.
Use a long focal length, if possible. Choosing a focal length over 50mm (Full Frame equivalent) will minimize distortion and show the product’s relative proportions more accurately. The sweet spot for this type of shots is usually between 85 and 135mm.
In general, the more light the better, so be sure to take the shots during the brighter part of the day. If your diffusor takes away too much light, using a tripod will become a necessity.
Keep ISO as low as possible to minimize noise. If you use a tripod, you won’t have a problem with this, even if you need to use super slow shutter speeds — think of 1 second and beyond.
Keep in mind that the longer the focal length, the farther away you’ll need to stand in order to achieve a similar field of view. These two aspects are always in opposition, so choose the compromise that works best with your available space. This will also depend on the size and shape of the object you want to photograph.
If the object you’re photographing is full of shiny reflective surfaces, using a flash may not be a good idea. If not, try firing off a few shots with the flash to see if you like the effect. If your window is bright enough and your reflector is properly positioned, the flash shouldn’t be strictly necessary. Also, keep in mind that using a flash will completely eliminate any shadows from the scene. If you want to make sure crucial details aren’t masked by shadows, think about using it.
Try to keep the backdrop out of focus, but shoot with enough depth of field to ensure most of the product remains in focus. If you’re shooting with a fast prime, you’ll probably need to stop the lens down a bit to achieve this. Besides gaining you some depth of field, stopping down the lens slightly will also result in sharper pictures with less chromatic aberration and vignetting, which is also highly preferred in product photography.
Be sure to check your images for focus every now and then, and always before switching the product’s position on the desk. Also, don’t forget to review all your images before taking down your studio setup.
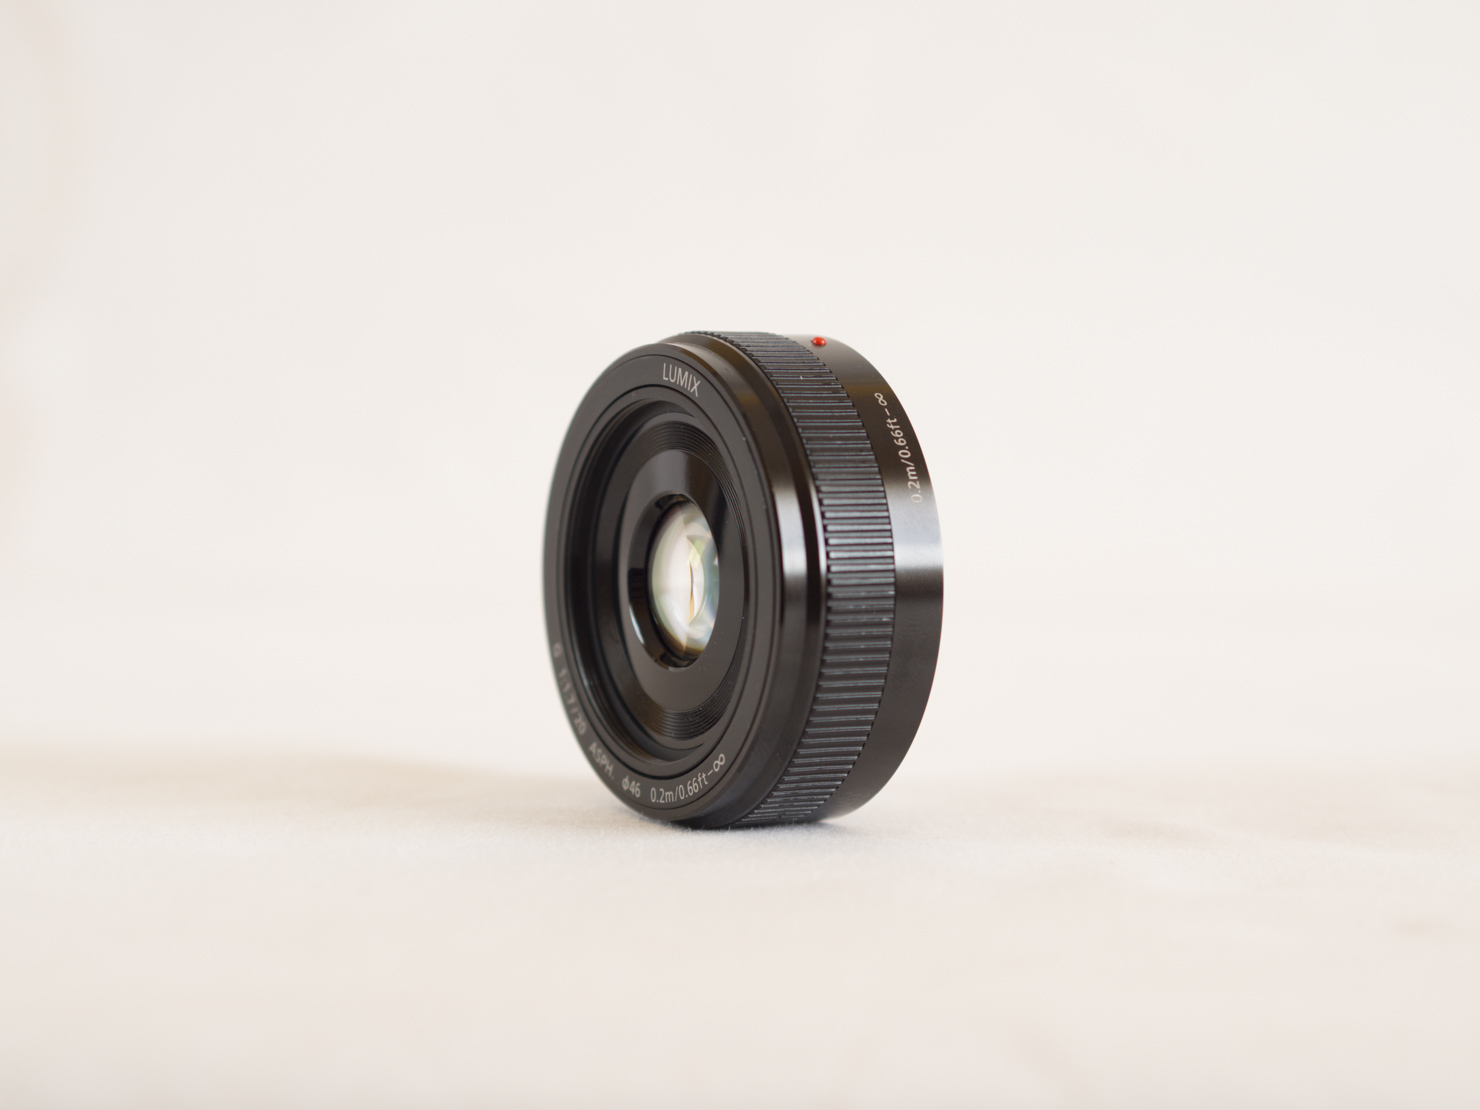
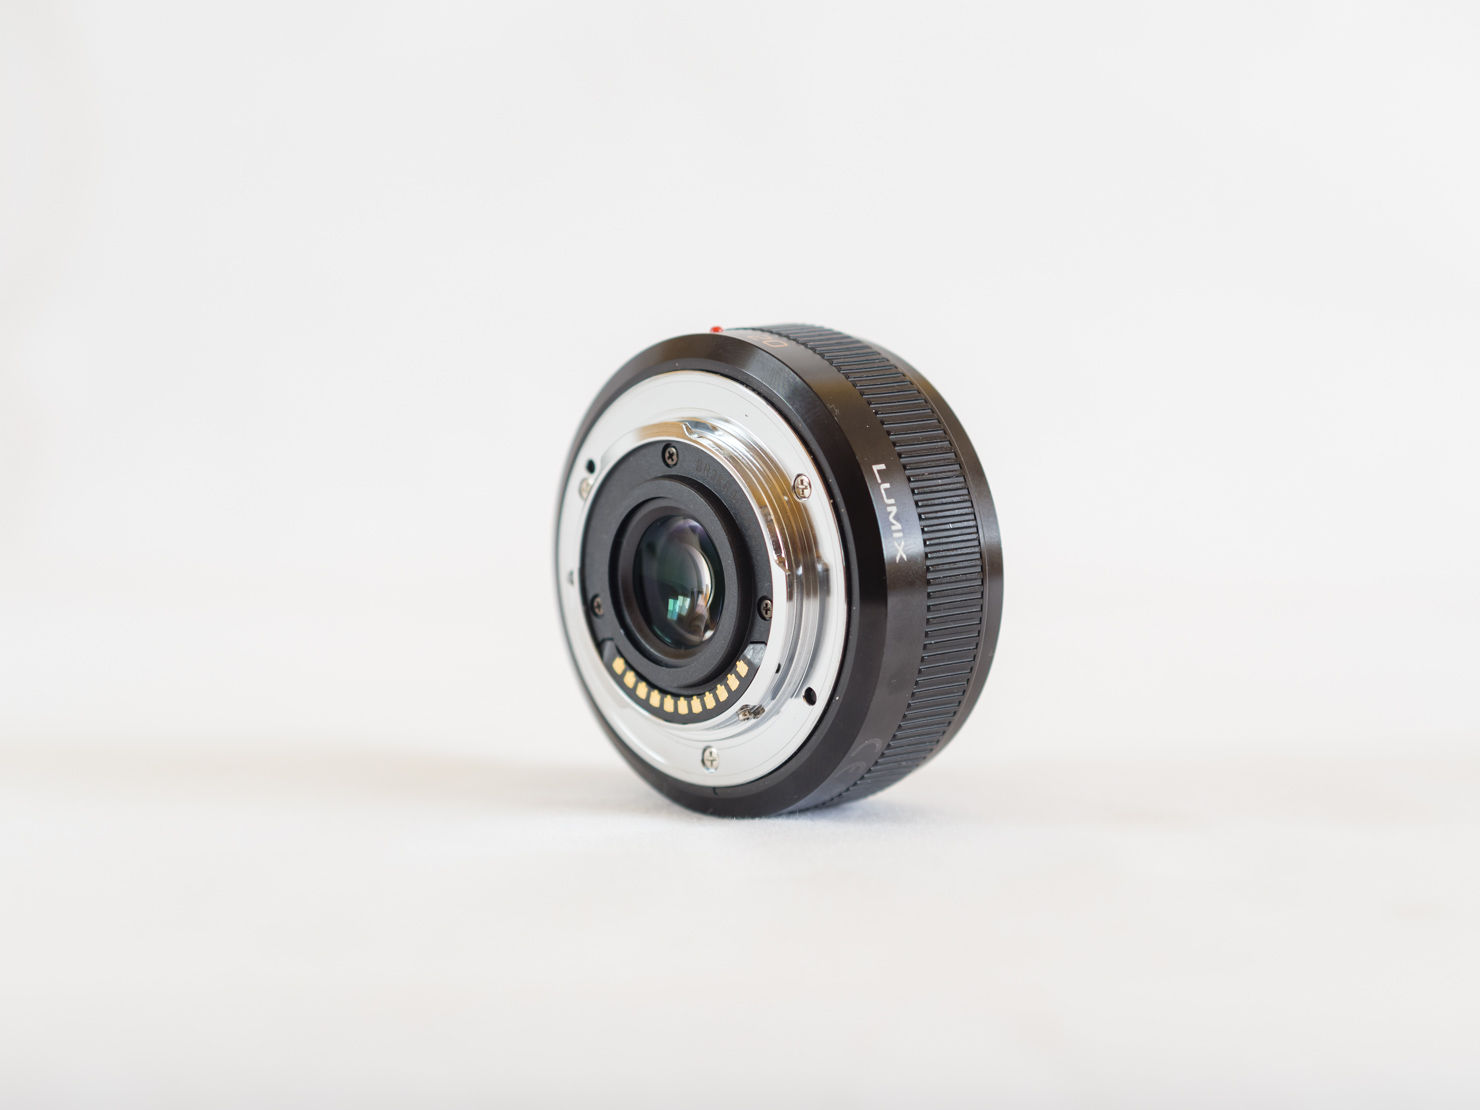
This is what you get straight out of camera when using this technique. It’s not bad, but we can do better. Let’s see how we can improve upon this in the post production stage.
Post production
Once we’ve taken the images, we’ll need to edit the files to remove any imperfections that remain. I will be using Lightroom here as a reference, but you can use whatever photo-editing application you want, provided they have a similar feature set. Luckily, most of them do.
Once we step into Lightroom, there are several things we can do. For starters, we need to set the appropriate white balance. Click on Auto and see if the image changes for better or worse. If you don’t like what you see, use the eye-dropper tool to set the gray point and click on the background, which should be white but not totally blown.

We can also can change the tone curve. I like to use a medium contrast curve to emphasize lines a little bit better.

Then, we need to equalize the highlights and the shadows. In general, I have found boosting the shadows by about +30 and reducing the highlights by about -40 is a good place to start.

Next up, we apply a bit of sharpening and noise reduction to get everything looking nice and sharp. If you’ve shot at a low ISO setting, go easy on the noise reduction because just a little bit will go a long way, and we don’t want to smear the details. These are my usual sharpening and NR settings:
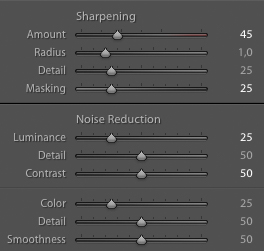
Again, these are just to get you started. You should of course tweak them to find something you’re happy with.

Now our picture should be looking fairly well, but the backdrop is probably still a bit distracting. In order to smoothen that out, we’re going to use Lightoom’s radial filter tool.

We click on it, and then we draw an ellipsis around our object, making sure that we’re capturing everything. This tool will apply our settings to everything outside the ellipsis, so we need to make sure we get it all. We can also adjust the intensity of the transition between the inside and the outside of the ellipsis by clicking and adjusting the Feather slider.

Once we’ve drawn the ellipsis and set the transition to something we like, we’re going to bring the Clarity and the Sharpness sliders all the way down to -100. This should greatly improve the appearance of the background.

In this case, the improvements are not that noticeable because framing was already quite tight, but if you have a wider composition, you’ll be able to appreciate it much more.
Conclusion
At this point, your images should be pretty much finished. As you’ve seen, all it takes is a bit of improvisation and patience, and you can get pretty good results right at home and without spending a dime. Obviously, doing these shots in a proper studio will always be better, but if you ever find yourself without access to one, it’s good to know you have options.
This technique works very well for small products like cameras, lenses and the like. If you need to take pictures of bigger objects, you’ll probably need to consider buying a proper studio backdrop with a built-in support stand.
You may think this whole procedure is just too much hassle to be worth it, but it really isn’t. You can set everything up and take it down in about five minutes, so it’s actually easier and faster than driving to the studio when you think about it. And it doesn’t even take that much effort in post production, because you can save most of these edits as a Lightroom preset. Then, all you need to adjust for each individual shot are the white balance and the size of the ellipsis for the radial filter, both of which you can do in literally under 30 seconds.
I, for one, am pretty happy with how this experiment went, and you can bet I’ll be using this technique again for upcoming reviews. I love how incredibly simple it is, all things considered, and how great the results are. And, of course, not having to spend any money also helps.