Anti-glare covers are a cheap and easy way to eliminate the biggest, most annoying issue that I have experienced with my 13" MacBook Pro 2010: The Glare™.
There is, of course, another option: having the stock screen replaced by a custom-made matte screen. TechRestore offers such service for the 13" MacBook Pro for $199 + shipping charges. This is obviously the highest quality option, but it’s also the most expensive, and will most likely void your warranty. Besides, living outside the US, this is not a realistic option for me. But if you live there and want to give it a try, this promises to be a great choice. After all, the warranty loss is really not much of an issue if you don’t have AppleCare, because the one-year-warranty that Apple offers by default is simply laughable. The good part is that TechRestore will offer you an extended warranty that covers any issues you may experience as a result of the screen replacement. That is, I would say, a great way to gain the customer’s trust.
After carefully examining the different anti-glare protector options available, the decision came down to two models: Power Support’s Anti Glare Film and Moshi’s iVisor AG.
Both have their pros and cons, but what’s curious about it is that they turn out to be pretty opposite implementations of the same solution for the same problem. They both cost $35, so price is not a deciding point. Their main differences are:
Power Support’s Anti Glare Film ($34,95):
* Good: Once installed, it adheres to the screen perfectly.
* Bad: According to most people, installation is a pain, mainly because of the bubbles that appear beneath the film, which are nearly impossible to avoid. The good news is that most of these bubbles will work themselves out over time due to the static charge that keeps the film “glued” to the glass. However, any dust particle caught between the screen and the film will result in a different type of bubble, that can only be eliminated by removing the dust particle. In order to do that, you need to remove the film, catch the dust spec with some tape, and then reapply the film. This, of course, without letting any other particles get in the way during the process. According to most reviews and comments, this is nearly impossible to do properly, meaning that if you don’t get it right the first time (and chances are you won’t), the film is ruined and reapplication is not really an option. Some people go even as far as to suggest that you buy two of these when placing an order. One for practice, and another one for the real application, when you get REALLY good at it. This effectively doubles the price, but if you manage to do it right, the result could very much be worth every penny. And it’s still a lot cheaper than TechRestore’s screen replacement.

Moshi’s iVisor AG ($35):
* Good: Easier installation process, 100% bubble-free guaranteed. The hard part is cleaning the screen and working on a dust-free environment, but the included microfiber cloth certainly helps, which is a nice touch. If the end result is as good as Power Support’s film (and there’s no reason to think otherwise), then this is a no-brainer.
* Bad: The black bezel that surrounds the iVisor AG is odd. First, it’s not necessary (the MacBook Pro’s own bezel is already black, so what’s the point?) And second, in order to avoid covering the ambient light sensor and the MacBook Pro logo, these areas of the bezel have been degraded from black to almost transparent. The final appearance can be weird, like these areas are washed-out, or something. This is just cosmetic, of course, but for $35 they could have thought it through a little bit more.
In the end I decided that I didn’t care so much about a black bezel and I’d rather have a pain-free installation, so I went to a local Premium Reseller and got the iVisor AG. Moshi’s reputation among their customers is nearly impeccable, and most of the comments I read said that their products are of high quality and that their attention to detail is impressive. This also eased my mind into picking the iVisor AG over Power Support’s anti-glare film.
Let’s now see how it performs, and whether it’s worth getting it:
Installation
This rocks, you can literally put it on in two minutes. Provided you can find a dust-free environment to work in, this will be a breeze. Just wipe the screen clean with the included microfiber cloth, and you’re good to go. Proceed as recommended in the instructions included and you should be OK. Just start aligning the top with the iSight camera and work your way down from there, it’s really easy. The iVisor AG won’t make any bubbles, as promised. Also, removing it and reapplying it is no problem at all. Just peel it off with your hand from any of the lower corners, and then put it back on just like you did the first time. No sweat. It doesn’t leave any residue on the screen when removed, which is great, too.
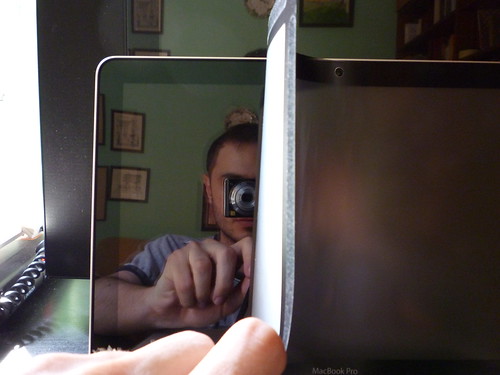
Bye, Bye, reflections!
After installing the iVisor AG, reflections are literally gone. I mean it, there’s a huge difference. Here are some examples (click through for the full-sized versions):


Under the Sun
If reflections are in your worst nightmares, then this thing is for you. Even under direct sunlight, the MacBook Pro screen is definitely usable. Please note that any laptop will be uncomfortable to use under the Sun for an extended period of time. While the iVisor AG is good at handling reflections, it’s not magical.
But…
The iVisor AG is a great product that does extremely well the one thing you bought it for: killing reflections. However, it’s not a product without its flaws. Some of them are more important than others, and it’s up to you to decide whether they are deal breakers for you. Here’s a breakdown of its weaker points:
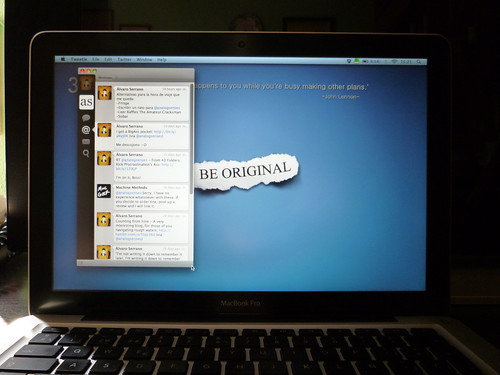
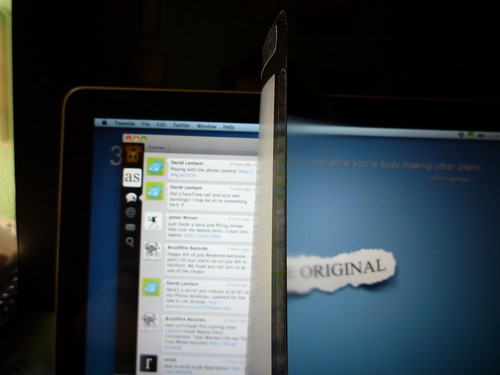
Text Sharpness
This something I noticed only after purchasing it. The easier installation process means the end result is not as high-quality as one would expect. The adhesive used by Moshi is located only on the bezel of the screen protector, and instead of adhering itself to the whole screen with static charge, it just sits on top of the glass. This allows for a bubble-free installation, but it means that there is always a tiny gap between the iVisor layer and the actual glass, which produces a certain loss of sharpness that can be noticed especially in text. This can be very annoying at times until you get used to it, because your eye constantly tries to focus the text, which is impossible. It’s also especially bad with a white background, because the white light diffracts when it travels through the iVisor, resulting in a miniature rainbow effect on every pixel that makes it look like the screen under the protector is dirty, which is not the case. Moreover, it’s frustrating because if you press the iVisor onto the screen with your hands you can see the text perfectly clear, which gives you a hint of how good this protector could be if the adherence to the screen had been better designed (ahem, Power Support, I’m looking at you).
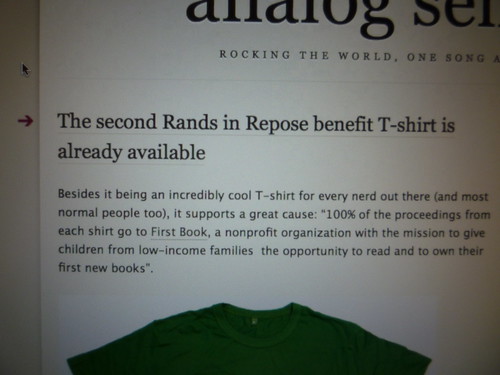
An example from analog senses
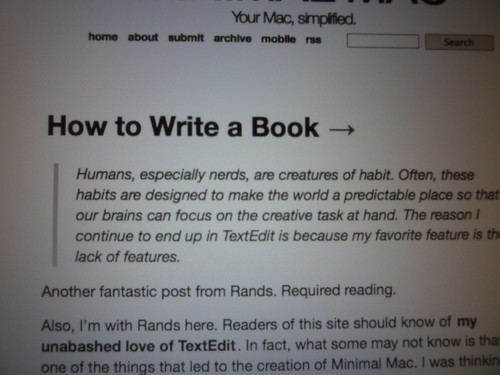
Another example, from Minimal Mac
Now, it’s not as bad as it looks here. The on-screen text is definitely readable and it’s actually not bad if you use a decent sized font. The thing is: it’s just noticeable. All the time. This was my biggest gripe for the first few days, so much so that I almost tried to return it. But it is kind of growing on me, or perhaps I’m getting used to it. Still, if you’re obsessed with details (and people that hate reflections so much tend to be), this could drive you mad. It’s definitely a quality loss on your beloved MacBook Pro’s screen. The question is, is it worth it in order to get rid of the glare? If you need to be on the move a lot with your laptop, I would say yes, definitely. However, if it’s just occasional use and the majority of the time you use it indoors, then not so much.
As a positive side-effect, this gap means that if a tiny dust particle is caught between the screen and the protector, it’s not a problem at all. That alone could make up for the loss in sharpness. It also means you can definitely remove the iVisor and reapply it without having to work on a clean room, which gives you more freedom to decide how you want to use it: you can either leave it on at all times, or remove it and only apply it when you can foresee intense working periods during which you’ll need to use your laptop (students, I’m talking about the month before the exams).
I’ve had it on for two weeks now, all the time, during which I’ve been using my laptop from moderately to rather intensely, and I’ve gotten used to it. Still, sometimes I think of how gorgeous my screen used to be and I get a little edgy.
Brightness
This is an obvious problem. Having something covering your screen means the light can’t travel through as easily as before. Despite Moshi’s claims that the iVisor’s transparency is over 90%, the brightness hit is clearly noticeable, especially when working with text. This means you’ll have to increase the brightness settings, which in turn will drain your battery. In my experience, having the brightness set at any point below six hits from max becomes pretty uncomfortable to use. Fortunately, the new 13" MacBook Pro (and the previous generation, too) has battery life to spare, so this shouldn’t bother you much.
Viewing angle
Simply put, it’s terrible. Anything other than looking straight at the screen becomes impossible to use. Again, this is especially true with text. It quickly becomes blurry and extremely uncomfortable to read. This is partly due to the before mentioned gap, as the distance traveled by the light is greater if you look from the side as opposed to looking straight at it, and the blurriness is increased accordingly. This is clearly not a way to watch movies with friends.
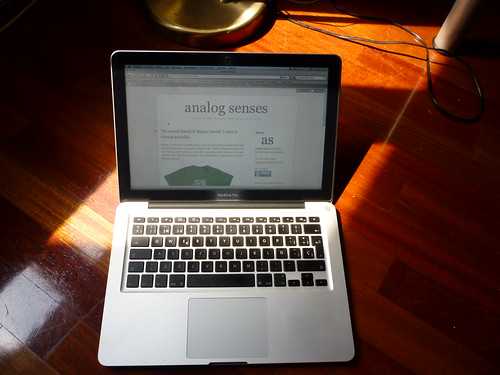
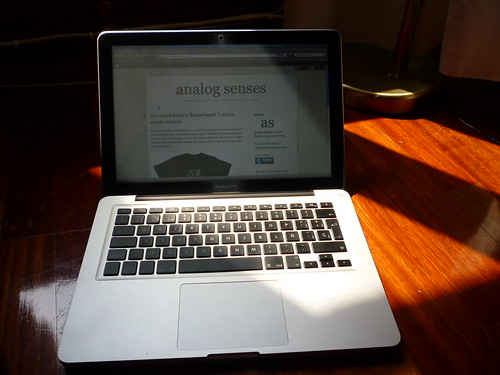
Colors
The colors are dulled and a bit washed out, but in my experience this was not nearly as bad as I was expecting. The screen still looks great when the brightness is set high. Still, if color is important for you, this could be a problem. This is clearly not for professional use (photographers, you’re out of luck). I’ve read that re-calibration of the monitor helps, but obviously it can only get you so far. If you need color accuracy, I would strongly suggest the TechRestore option, since the replaced screen has the exact same specs as the original, which are pretty good. For normal use, however, you’ll be perfectly OK.
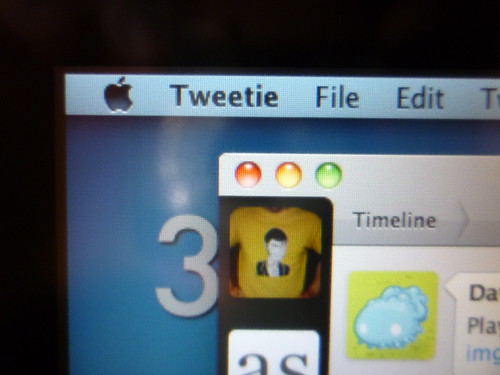
The MacBook Pro screen with the iVisor AG on
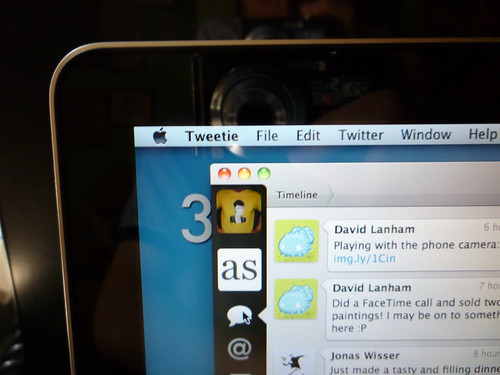
The original MacBook Pro screen, without the iVisor AG
There’s not a huge difference in color
Conclusion
All in all, the iVisor AG is a good product and it will do its job tremendously well, but certain flaws keep it from being a great option for everyone. After getting used to it, I’m starting to really like it, but I can’t help but wonder if I wouldn’t have liked Power Support’s anti-glare film better. For what I’ve seen in using the iVisor, most of its issues are derived from the existence of a tiny gap between the protector and the screen. Thus, an anti-glare film that is perfectly adhered to the screen (like Power Support’s) would make for a terrific solution. In my opinion, if you’re relaxed about these limitations, then the ease of installation wins hands down. But if you’d rather have the best end result and quality, then it could be really worth it to spend the time and effort necessary to install Power Support’s anti-glare film properly.
Final Words
This was the first product review in the short history of analog senses, so it’s somewhat a special occasion. The reason there had been none to date is that, like I said in The Manifest, this is not a technology-exclusive blog, nor does it intend to add to the myriad of blogs already doing excellent reviews of devices and issues about which I could hardly offer any insight at all. My point is that I’m not planning to step on anybody’s toes, and I’d rather focus on other topics for this blog on a regular basis.
That said, I hope you have enjoyed this one, and even more, I hope it can be useful to you. You can browse through the whole set of images here.